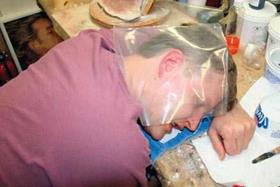
Much of the time, you will want to cast your subject with the leg straight, in a standing position; even if you want a leg bent at the knee, the process will be the same. Your subject’s comfort is very important for this process because she will need to hold the same position for an extended period of time, so you need to come up with a system in your workspace that will let you make your subject comfortable and still provide you with the room you need to make the lifecast. Even if you encase the leg in one batch of alginate and make a cut to separate the leg and alginate, you will make a two-part mother mold. Creating some sort of keys will help hold the soft mold and rigid mold together in registration.
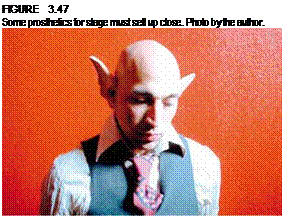
Ears are interesting bits of anatomy, and you need to take great care to create a convincing appliance—whether it is an earlobe extension to simulate gauged piercings, ear tips for a fantasy character or alien, or a full ear prosthetic that needs to sell an audience up close.
 If you cast a head and shoulders bust, casting ears separately from the head and shoulders lifecast can provide you with ears to complete the head or with base ears from which to create character ears. Let’s begin by cutting the bottom off a large deli container about 4% inches (11.5 cm) in diameter and 3 inches (7.5 cm) deep. Be careful cutting off the bottom of the container!
1. Cut a slit in a piece of clear plastic sheet (such
as from a large lawn bag) about 10 inches by 10 inches (25 cm by 25 cm) and fit it over your subject’s ear. You will need a piece for each ear. Use spirit gum of Pros-Aide® to glue the plastic at the edges around the ear for a clean casting. You might need to trim the plastic a bit first so there won’t be any wrinkles. Use tape if you need to keep the outside edges of the plastic lying flat.
2. Make a thin line of nose and scar wax or use tape and place it along the larger edge of the plastic container to help prevent alginate from running out.
|
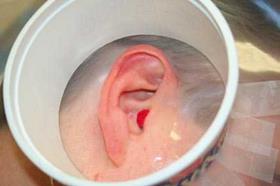
3. Have your model’s head rested on a table or against his hand so that his head and ear are horizontal, where it must remain until the alginate mold is removed. Though it is not necessary, for your model’s added comfort place a piece of cotton or piece of foam earplug into his ear canal to close it.
4. Place the plastic container over your subject’s ear and make sure it is centered. Press it and the nose wax down so that it sticks to the plastic. Check for gaps, and seal them with extra wax if necessary.
5. 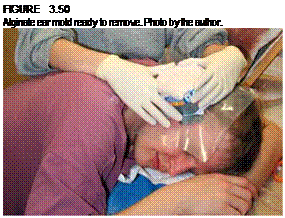 We’ve been using EnvironMolds alginates and will continue to do so for this task. However, you might decide to use dental alginate because it sets quickly. EnvironMolds has a dental alginate called Hollywood Impressions, and there are others that are listed in the appendix of this book. Accu-Cast® 390 alginate—which is not a dental alginate; it’s just quick setting—has a working time of 3 minutes and is also a choice you might consider. Working with warm water, the MoldGel will set pretty quickly. Mix a small batch of alginate by eye—don’t worry about the formula here—to a consistency that you can easily pour but not so runny that it’s filled with air bubbles. When it’s mixed, pour it into the plastic ring of the container until it is about % inch (12 mm) past the top of the ear. Use your finger to make sure the alginate gets behind, under, around, and into every bend and fold of the ear. Let the alginate set.
6. Next, gently separate the container from the plastic covering your model’s face, starting from the front of the ear so that you don’t damage the alginate negative.
The alginate is fairly thick, so it will not dry and shrink rapidly, but if you want to cast the other ear before making a stone positive, wrap the alginate in wet cloth or paper towels. Then repeat steps 1 through 6 on your model’s other ear.
![]()
7. When you’re ready to cast positives of both ears, cut strips of craft foam about 1%-inch wider than your alginate container is thick. Wrap the foam around the plastic container to form a wall and secure it with masking tape, gaffers tape, or duct tape. There should be no gaps between the foam wall and the edge of the container for the Ultracal to seep through.
8. Mix a batch of Ultracal large enough to cast both ears and a base. Don’t mix the Ultracal too runny but you should be able to pour it.
Pour the Ultracal slowly into the mold and
let it fill up the ear cavity. Before it is completely filled, tilt, tap, and rotate the mold to get the Ultracal into all the spaces. You can also gently squeeze the entire mold to get rid of trapped air pockets. Then continue to fill the mold until the Ultracal is about an inch thick above the alginate. Tap it gently until the air bubbles all disappear, and then let the stone cure.
9. ![]()

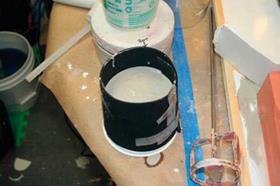 When the Ultracal has cooled, remove the foam wall and the plastic container, which should come off easily. With a dull knife or spatula or a slightly sharpened wooden craft stick (you don’t want to scratch or otherwise damage the positive), you can begin to cut away the thickest part of the alginate.
10. When you’re certain the Ultracal is fully cured, remove the rest of the alginate a little at a time from front to back so that you don’t risk breaking off the Helix and Schaphoid fossa.
11. With a rasp or sandpaper, smooth out any defects or rough areas, and your ear positives are ready for sculpting.

