To create a dead body lying prone, we first need a live body lying prone. Since we will only be casting one side of a subject, we need less alginate than for a full body front and back. For this task we need about 8 lb. of alginate. Here is a rough list of what you’ll need:
8 lbs. of alginate Clock or timer
Scissors to cut plaster and burlap 4- or 6-inch rolls of plaster ban
dages (x 2)
Lots of warm water Thermometer
18-quart roaster oven Misc. plastic buckets and cups

 |
Since this is a learning exercise, let’s make it an exercise that won’t frustrate you to the point of looking for another line of work. How about a corpse laid out on an autopsy table? Seems simple enough. You need a model who won’t mind lying absolutely still for a while. You also need a surface large enough for your subject to be posed on, as well as a space large enough to work in comfortably without everyone running into each other like the Keystone Cops! My studio is too small, so we enlisted Dave Parvin’s studio, which is quite roomy. There were six of us working, including our model Nicole Feil, one of my former students who is now a visual effects artist working in New York.
If we were to mix all our alginate at once, it would solidify way before we were done applying it to our model. Since we don’t want that to happen, we will mix up a smaller amount and add to the alginate we’ve already applied. Remember that alginate will not stick to itself once it has set up, unless we do—what? We need to retard the set. We can do that in one of two ways: (1) We can use colder water, which is usually less comfortable for subjects than warm water (since this particular subject will be modeling for a corpse, we want our skin to be somewhat relaxed, not all hard and goosebumpy), or (2) We can spray our alginate with Algislo® or a solution of baking soda and water to react with the surface of the alginate and make it sticky and able to receive new alginate and stick. We will use this method to also get cotton fuzz and cheesecloth to stick to the alginate for the plaster mother mold.
The positive from this lifecasting session will be different from the ones created up to this point. Instead of making an Ultracal positive, this positive will be only another step toward a finished camera-ready piece. We will make an oil clay skin and urethane foam-core positive. We need to do substantial sculpture work on this positive if we are to have a convincing autopsy subject.
We’ll do this lifecast in two stages. Stage one will be a cast of the body minus the head; stage two will be the cast of the head. When both lifecasts are completed, we will put the two molds together and reinforce the seam with plaster
before we fill the mold and make our one-piece positive. When the two casts are put together, a layer of melted clay will be brushed into the alginate mold—at least % inch in most places, thicker in others, depending on what your ultimate autopsy corpse design entails.
After putting water in the bottom of the roaster oven, you need to put as much of the clay as you can safely put into the top of the roaster and turn the thermostat to just under 200oF (93oC); somewhere between 175oF and 200oF should be fine. It will take a while for the clay to liquefy—probably several hours, depending on which clay you actually use, so plan ahead.
1. Divide the alginate into separate containers with about 1 lb. (16 oz.) of alginate in each; set one of the containers aside for the head. We are using EnvironMolds’ FiberGel.® That’s eight batches. If we mix the alginate to the ratio of 5 oz. of alginate per lb. of water, we will need 3 lb. 3.2 oz. (51.2 oz.) of 80oF (about 27oC) water for each batch; for the math challenged, that’s 3.2 oz. of water per 1 oz. of alginate. It would be ideal to have the water premeasured before starting. (Interestingly, a fluid ounce of water weighs one ounce, so 1 lb. (16 oz.) of water is 16 ounces by volume as well.)
2. ![]()
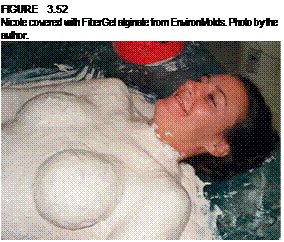
You shouldn’t need to release your subject’s skin with anything—petroleum jelly or cholesterol—unless there is hair present that could get caught in the alginate. If that is the case, work cholesterol or petroleum jelly thoroughly through the hair so that it will release easily when the alginate is removed. Our model Nicole wore an old bikini bottom that she didn’t care about; we thoroughly released the fabric with vegetable oil so that the alginate would not impregnate itself into the fabric and would separate easily.
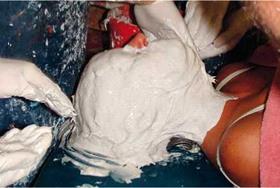
3. With your subject comfortably in position, mix one of the batches of alginate and begin to apply it at the neck and work your way down the body, making sure to spread the alginate, not just glob it on.
Even though we will be doing sculpture work on the positive, we still want to avoid air bubbles and make our cast as good as possible. Be careful to not spread the alginate too thinly. We can add more alginate if necessary, but try to do it evenly to begin with. The alginate should be between У4 inch and Vi inch (about 6 mm to about 12 mm) thick.
4. While the first batch of alginate is being applied, a second batch should be getting mixed so that it can be applied immediately after the first one, before it has started to set up. While the alginate is being mixed and applied, someone also should be making sure the cotton and cheesecloth will be ready to apply once the alginate has been fully applied.
5. Spray the alginate with Algislo. For best results the surface of the alginate should be sprayed before it sets. This will act as a surface set retarder,
![]()
![]()
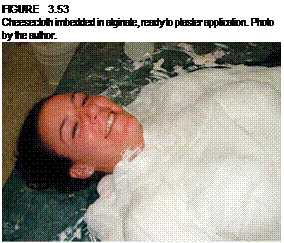

 giving you time to apply cotton or cheesecloth on the surface. If that’s not possible, the surface should be recently set. Spray the surface rather than using a paintbrush; the results will be more even, and you want to avoid pulling on a tacky area. Rub the Algislo on the alginate with a gloved hand to determine whether it is sticky enough for cotton fuzz and cheesecloth to stick. When it is, dab the cotton onto the alginate and pull back, leaving some of the fuzz, which will be enough for plaster to adhere to. Lightly press cheesecloth onto the alginate, especially near the edges of the alginate.
6. For the plaster mother mold, you will want to use Impression dental plaster or #1 Potter’s Plaster (with terra alba to shorten the set time) as the primary shell and plaster bandages for adhering wood supports after the shell has set. Mix a small bucket of plaster; mix only as much as you can use working fairly quickly, because you don’t want the plaster to kick while most of it is still in the bucket. Brush the plaster into the cheesecloth and smooth it as you go. As you brush a layer of plaster onto cheesecloth, have another of your team add more cheesecloth on top of the fresh plaster. While this is taking place, more plaster should be mixed in a new bucket. Remember, if you mix new plaster in a container that has setup plaster in it, the hard plaster will cause the new plaster to kick much more quickly than if it had been mixed in a clean bucket.
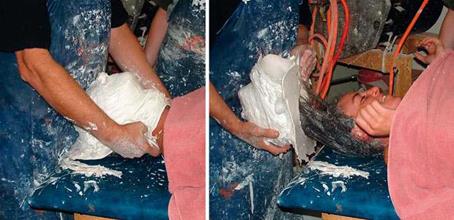
7. When the plaster mother mold has set, the mold can be carefully removed. We have not built the supports yet. While the model is getting cleaned up and ready for the next step (casting the head), the supports can be attached using the lengths of 1 x 2-inch wood strips. The purpose of these supports is to prevent the mold from buckling or cracking from the weight of the clay, plaster, and alginate when it is repositioned for attaching the head and then for removing the positive once the mold has been filled. One long piece should be positioned along the torso and leg on each side of the mold. The shorter pieces are to be laid across the log pieces and screwed together. Once the four pieces of wood are attached to each other, they need to be attached to the plaster mother mold. Plaster bandages wet in 50/50 mixture of water and acrylic bonding agent can be wrapped around the wood joints and pressed onto the plaster shell to form a strong bond.
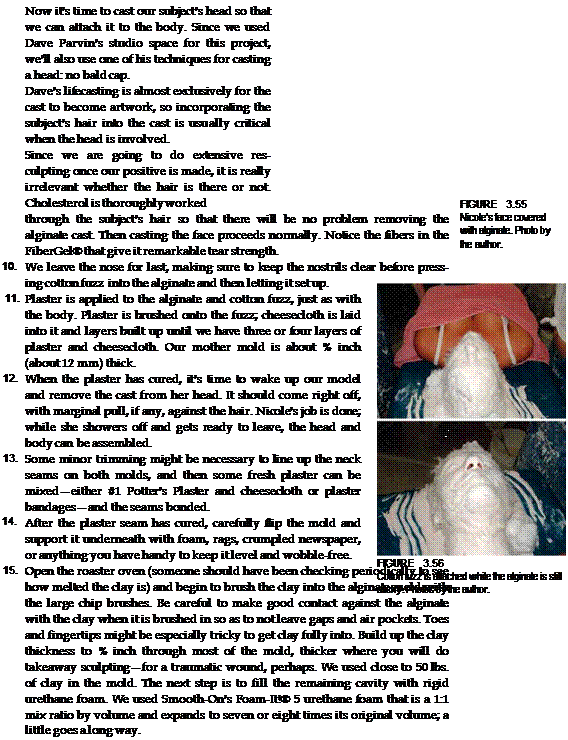
8. Mix up a batch of plaster using the same 50/50 mixture of water and acrylic bonding agent and spread it over the wood joints and plaster bandages to give the mold a really strong connection between the wood and the plaster shell.
 |
![]()
![]()
|
![]()
16. Mix small batches at a time and pour it into the mold, brushing it into the mold until you see it begin to rise. It becomes tack-free in several minutes and develops handling strength in about 20 minutes. Full cure is 2 hours; the foam goes through a heat reaction during its cure also. If you pour freshly mixed foam liquid onto risen foam that has not begun to solidify, it could collapse, so be aware of that as you work.
17. Since quite a bit of melted clay was put into the mold and the foam also generated heat during its cure, it would be a good idea to let the mold cool overnight and demold the positive the next day. At the very least, you should wait several hours before attempting to demold the clay and foam positive. If the clay is not completely cooled and back to its restive state of hardness, you could damage the positive when you begin to peel away the plaster shell and alginate.
18. You might need to do some sanding or cutting to flatten the foam backing so that your positive cast will lie flat when it is turned over to remove the mold.
19. Take your time removing the plaster and alginate. The plaster is quite hard and will require effort to cut and pull it away without damaging the positive.
Now you have a full body cast of a prone body. There is still much work to be done, but now the real fun can begin!
