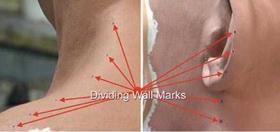
 After the keys and flashing have been made, you’ll divide the sculpture by creating a dividing wall along a predetermined line that will prevent creating undercuts. Traditionally in sculpture this dividing wall is created using metal shims (thin wedges) pressed into the sculpture to create a separating line between two mold halves. You’ll use water clay instead of shims because shims will damage the sculpture too much.
1.  Before cutting and placing clay, take a Sharpie or similar marker and mark small dots along the line you intend to follow with the clay wall—a line that will prevent formation of undercuts that will possibly damage the mold.
2. Using a clay cutting tool, either a wire cutter and a piece of Masonite® with paint
![]()
sticks glued to each side (the width of the clay block) or an adjustable clay cutter, cut slabs of clay about % inch thick; lay them flat and cut strips about 2 inches wide and 4 or 5 inches long.
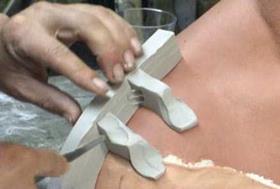
3. Begin to place these strips of clay along the dotted line you made along the ridge line of the sculpture, pressing down hard enough to get a good connection between the clay and the sculpture but not so hard as to cause a bulge at the contact point. You want the clay wall to be perpendicular to the sculpture and the edge to be clean and smooth; make the wall as close to 90o as you can.
A perfect wall will have no gaps where the water clay meets the oil clay. The clay in these pictures is Laguna WED clay.
4. Build the wall all the way around the sculpture. It is critical that the meeting point be closed and neat. You can use a small dental tool and a fine, soft brush dipped in water to smooth the clay in critical areas. You don’t need to use much water. Alternate between smoothing and brushing until the seam where the wall meets the sculpture is perfectly smooth.
5. ![]()

 When the wall is finished, spray the sculpture (the side you’re going to cover with Ultracal first) with a light coat of Krylon Crystal Clear.® When it’s dry, spray another coat and then spray a coat of Dulling Spray over the Crystal Clear. The reason for the Dulling Spray is to prevent the Ultracal from beading up and rolling off the sculpture when you brush on your thin detail coat.
