by Gil Mosko
To make a gypsum mold, the mold maker needs to take a life cast of the actor and reproduce his or her face in gypsum (the positive mold). The most popular type of gypsum is Ultracal 30 from United States Gypsum, which is bought in 100-pound bags, or in smaller amounts from makeup- supply houses (such as Motion Picture Effects Company, in Burbank, California). The mold maker would now need to complete a sculpture on the positive. There are many types of clay to sculpt with. Plastilina is the generic name for oil-based clay that never dries out. Common types are Roma Plastilina, and Chavant Clay.
![]() Once the sculpture is completed, it is important to use more plastilina around the outside of the sculpture to provide “relief” from the negative. In other words, by using this “flashing clay,” a thin strip of contact between positive and negative is created. Having a thin strip of contact creates less surface area of contact, and therefore needs less pressure to squeeze foam out of this contact area. The finished foam piece will now have a very thin edge, which is most desirable for the Makeup Artist who is applying the appliance to hide in the final makeup application. The finished sculpture, complete with its flashing and setter points of contact (to prevent rocking), is now
Once the sculpture is completed, it is important to use more plastilina around the outside of the sculpture to provide “relief” from the negative. In other words, by using this “flashing clay,” a thin strip of contact between positive and negative is created. Having a thin strip of contact creates less surface area of contact, and therefore needs less pressure to squeeze foam out of this contact area. The finished foam piece will now have a very thin edge, which is most desirable for the Makeup Artist who is applying the appliance to hide in the final makeup application. The finished sculpture, complete with its flashing and setter points of contact (to prevent rocking), is now
 sprayed with Krylon Crystal Clear Acrylic Spray. This creates a barrier that prevents the positive and negative from sticking to each other during the molding process. Many mold makers also use a very light spray of MR 1500 (spray Vaseline) or Parfilm spray.
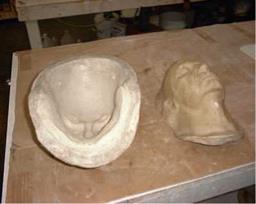
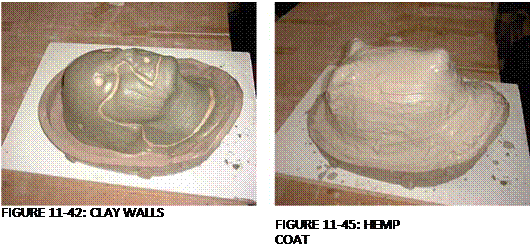
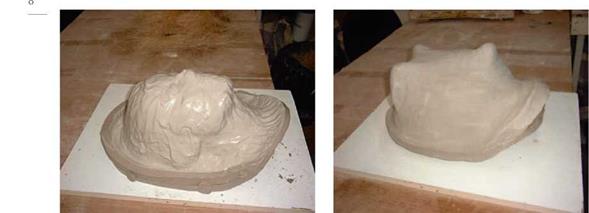
The simplest form of foam mold is the two – piece squash mold. It has a simple positive, free from undercuts. To match it, there is a one-piece negative, containing all the information from the original sculpture, but in the reverse, or negative. These two mold pieces fit together intimately. The moldmaking steps are simply put: make a wet clay floor and walls around the sculpture, which sits on the mold positive; splash a coat of wet gypsum; add a second splash coat, hemp or burlap coats, and a finishing coat; including three feet.
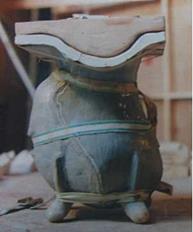
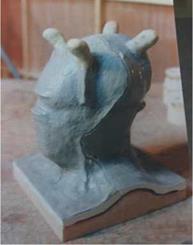
Our lab has a steadfast rule: “Feet on every mold.” Having little feet on the negative means that the mold will sit in a stable manner on the table, without rolling or rocking. This will enable the user to adjust the mold strap without having the resistance of the mold sitting on the strap. This is especially helpful in light of having a full foam injector and many molds to fill. The user can save precious seconds by not having to fiddle with mold straps that are rubbing against the bottom of the negative mold.
The most popular form of gypsum for these molds is Ultracal 30, from United States Gypsum. Although many people use burlap as a mold-strengthening fiber, we prefer using hemp fiber. The simple reason is that hemp has many more fibers per inch than
burlap, and the number of fibers adds to the strength of the mold. Once the mold is finished, it is always best if you have the time to allow the mold to sit overnight before opening it. GM Foam likes to heat the mold to about 120 degrees Fahrenheit, so the plastilina inside will be softened. In this way, the positive and negative can be separated with far less resistance from the rock-hard, cold plastilina.
In extreme cases, preheating before opening a mold will actually save the interior of the negative, which would otherwise be chipped and broken by the hard, cold plastilina.
After opening the two mold halves (positive and negative), all of the plastilina must be carefully removed. Use wooden tools to scrape away the plastilina. Never use metal tools, which will scratch the interior of a mold. When the mold is fairly clean, it is time to scrub the interior with 99 percent isopropyl alcohol with a chip brush. This will wash out any remaining plastilina residue and oil. Your mold is now ready to be prepped for foam use.
New damp molds should be sealed before attempting to run foam in them. Use a thin solution of Johnson’s Paste Wax, thinned with 99 percent isopropyl alcohol. The ratio is about 4 to 5 parts alcohol to 1 part wax. Mix well, then strain out the lumps through cheesecloth or window screen. Paint this “Alco wax” into both sides of the mold, all over the interior. Mop up any pools, and place the mold in front of a fan to dry. After the alcohol has evaporated, repeat this sealing process. It is always wise to bake out wet molds at this point. A convection oven works much better than a plain oven that does not have circulating air. We bake out
molds at 140° Fahrenheit, but many of our friends use temperatures as high as 180°F. The moisture will stay in the mold for much longer than you think. It often takes a minimum of six hours to truly bake a mold.
After baking the empty mold, a third painting of Alco wax is done. When that is dry, the interior mold surface can be brushed out with a chip brush, or polished with a towel. This will make the surface shine. Use GM Foam Mold Release around all of the edges, where the mold pieces contact each other. Just paint a very thin layer of the white GM Release all around the perimeter of the piece, and let dry to white film. Your mold is now ready to be used with foam.
1. Little feet (Figure 11.39).
2. Little feet (Figure 11.40).
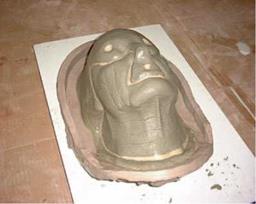
3. Sculpture (Figure 11.41).
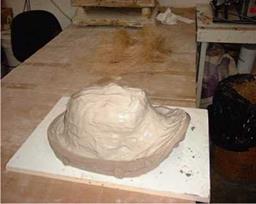
4. Clay walls (Figure 11.42).
5. First splash coat (Figure 11.43).
6. Second splash coat (Figure 11.44).
7. Hemp coat (Figure 11.45).
8. Finished coat (Figure 11.46).
9. Two pieces (Figure 11.47)
All of GM Foam’s latex kits come with excellent instruction sheets. For this
|
FIGURE 11-40: 2nd LITTLE FEET |
|
|
|
 |
|||
|
|
||
|
|
![]()

illustration, let it suffice to say that liquid latex and other ingredients are weighed into the mixer bowl. The mixer is turned on low for a minute to mix all the ingredients, and then turned to a high speed to whip the foam to a desired volume, usually four to five times the original volume. When the foam reaches this height, the mixer is turned down to a lower speed to pop large bubbles and “refine” the foam. All the while, ammonia is escaping from the mixer bowl. As a function of this ammonia loss, the foam will have a steady drop in pH. When a certain point is reached (usually pH 10.4), the user carefully pours in a preweighed amount of gelling agent. This begins an acid-producing reaction in the foam, which will eventually coagulate into a solid mass, or “gel.” Before the foam actually gels, the user will have ample time to fill the foam molds and close them. It is important to gel the foam before putting it into an oven to cure, because ungelled foam will collapse if it feels the heat of the oven. Cells will start popping, and the resulting foam will look like Swiss cheese.
Curing the foam will cause the rubber molecules to cross-link, or “vulcanize.” This transforms the raw foam into a springy sponge. Most small appliance molds will need three to three-and-a-half hours in the oven at 185° Fahrenheit.
Then the molds are cooled slowly to a comfortable temperature for handling.
When removed from the oven, the two mold halves are pried apart, and the resulting foam piece is removed, taking great care not to tear it during removal from the mold.
DO NOT USE YOUR HOUSEHOLD COOKING OVEN FOR FOAM USE!
Please keep in mind that during the curing process, toxic vapors are given off, which will poison your oven for food use.
|
|
It is recommended that you wash the completed foam pieces in warm water and a few drops of baby shampoo, or a few spoonfuls of Simple Green. Then the pieces are gently rinsed, pressed between two towels, and placed on a form that keeps the natural curve of the piece intact. Never wring a piece of foam. If the foam is not allowed to dry in its own natural shape, it will “take a set” from any wrinkles or folds. These set-in flaws will almost always be permanent, ruining the piece, so please be careful to always store foam pieces in their natural curvature.
For long-term storage, foam pieces should be powdered, then sealed into plastic bags or airtight food containers. If kept in airtight containers, away from light, foam pieces can be successfully stored for years.

