by Erwin H. Kupitz
HOW TO MAKE A PROPER FULL-BEARD TEMPLATE OF AN ACTOR’S FACE
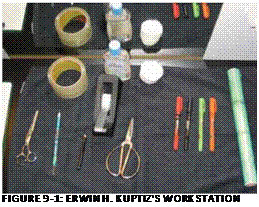
Materials and Tools Needed:
• Eyebrow pencil
• Plastic wrap
• ![]()
 Clear tape or matte tape
• Permanent markers
• Scissors
• Baby oil or makeup remover
• Tissue or cotton pads
•
 |
|
 Camera (digital or instant)
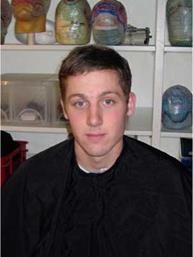
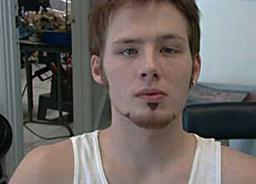
First, cover the actor with a cape.
|
FIGURE 9-2: ACTOR COVERED WITH CAPE |
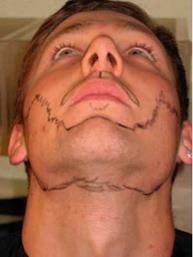
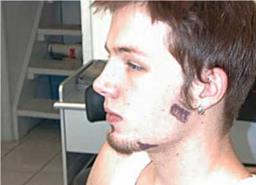
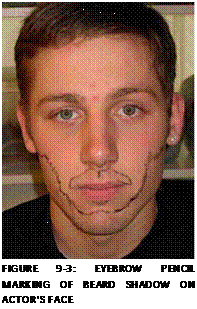
Using the eyebrow pencil, follow the beard shadow of the actor, and mark it on his skin.
|
FIGURE 9-4: CHIN VIEW OF EYEBROW PENCIL MARKING |
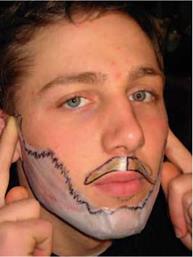
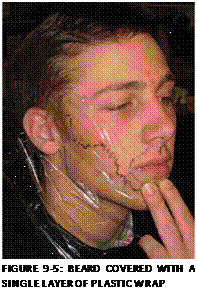
Cover the beard area (and disregard the mustache for now) with a single layer of plastic wrap, and secure with tape on the top of the actor’s head. Make sure that your eyebrow pencil notes (markings) are all covered with plastic wrap.
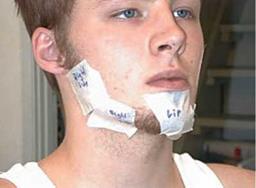
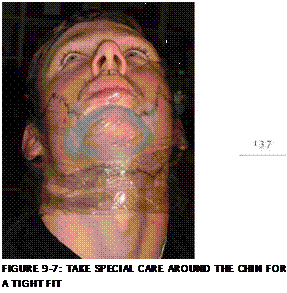
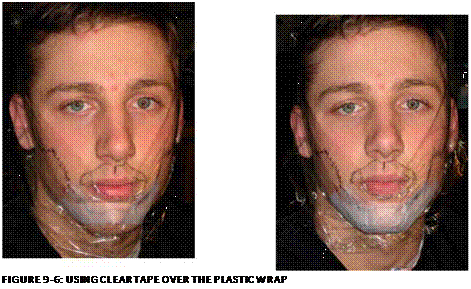
 Start using clear tape, and tape over the plastic wrap. Make sure that the tape is tight around the chin. This is very important for a proper fitting of the lace beard around the chin.
 |
|
Take special care below the chin and around the neck, making sure that the taped plastic wrap is tight. Two to three layers would be appropriate.
Now proceed to the sides of the beard, and cover again with two layers of tape. Use a permanent marker to trace the eyebrow pencil markings onto the tape.
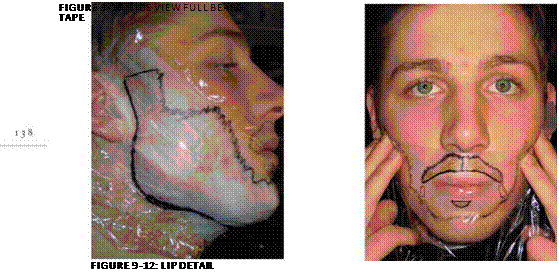
After the full beard is done, do the same to the mustache, lip piece, and two connector pieces between mustache and chin.
![]()
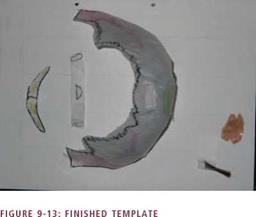
Now cut out the beard template above the permanent marker lines about 2 mm to 3 mm, and try the entire template again. Take special care around the chin. The template should lay tight around the chin and below the chin, and should lay flat onto the actor’s hair at the sideburns.
|
|
|
FIGURE 9-14: TEMPLATE CUT AND CHECKS |
After the beard template is checked and finished, while the eyebrow pencil markings are still on the skin, take photos from all sides. Clean up the actor’s face.
Cut out a hair sample from the actor’s own hair. If the actor’s hair is too short, refer to a swatch ring or hair color swatch book for reference. Sometimes sending hair from another source, such as a wig or someone else’s hair, is an alternative. Try to make a base that matches the desired skin tone of the actor, or a final skin tone of a character, and spread it onto a clean white paper or in between two layers of plastic wrap. This sample is needed as a guide to color the lace.
Double-check to make sure you have all of the items needed by the Wig Maker before you release the actor. (The approximate time to make a full beard is about four working days in backup or doubles.)
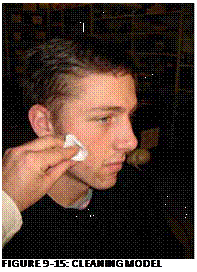
Use a lip or eyebrow pencil and masking tape to transfer markings from the face into the tape. This technique is very good for small or partial facial-hair additions. It also works well on a clean-shaven face.
![]()
Material and Tools Needed:
• Masking tape
• Eyebrow or lip pencils
• Scissors
• Loose powder and powder brush
• Towel
Procedure
Using the lip or eyebrow pencil, mark all facial-hair additions or trace the natural growth pattern and shape of the model’s facial hair. If needed, different colors help to design new shapes or mark special patterns.
|
FIGURE 9-16: MODEL WITH MARKINGS USING A BROWN EYEBROW PENCIL |
|
FIGURE 9-17: MARKINGS FOR SIDEBURN EXTENSIONS USING A BROWN EYEBROW PENCIL |
After all markings are done, use small pieces of masking tape, and apply one or two layers over the marked areas. Try not to use more than two layers because this would be too much of a buildup. In this demonstration, sideburn and chin-beard extensions and the addition of a lip piece are created.
|
FIGURE 9-18: SIDEBURN, CHIN BEARD EXTENSION AND LIP PIECE WITH TAPED AREAS |
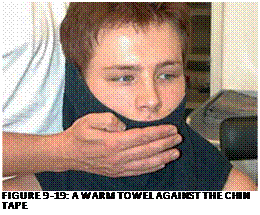
Using a warm towel (warmed for 10 minutes in a wig dryer), the areas are wrapped and pressed down tight with your hand. The heat of the towel as well as the pressure from your hands will transfer the grease in the eyebrow or lip pencil into the adhesive. A combination of gentle rubbing and pressing for about two to three minutes is recommended.
If doing a full-beard or chin-beard pattern, special care has to be taken around the curves of the chin to make sure the tape is pressed tight against the chin curve. This will ensure the proper shaping of the pattern and a tight fit of the final lace beard.
 |
 |
 After the pressing and rubbing is done, start carefully to remove the tape from the face. The markings are transferred into the tape.
Remove the tape carefully from the face.
|
FIGURE 9-20: REMOVING TAPE CAREFULLY FROM THE FACE |
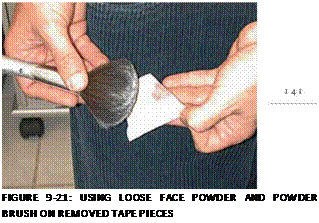
The removed tape pieces are organized on a towel and are ready to powder. Using loose face powder, powder the tape pieces to prevent them from sticking together or getting messed up.
The beard template can now be cut out and applied to a beard block, ready for making the lace pieces. After the lace pieces are done, it is recommended to store them together with pictures of the actor, as well as hair color and lace color swatches, in a plastic bag or box for future reference.
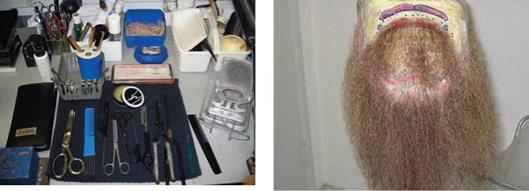
Tools in the photo of Erwin’s workstation (Figure 9.22):
• Cutting comb for combing hair during cut
• Rattail comb for separating and sectioning
• Small hair clips to secure separations
• Lifting comb for detangling and lifting permed hair
|
FIGURE 9-23: CHARACTER LACE BEARD PRIOR TO CUTTING AND STYLING
![]()
142
• Haircutting and thinning shears as well as razor for cutting hair
• Tweezers for eventual plugging and finishing of hairline
• Ceramic iron heater
• Flat curling iron for lifting and shaping
• Small marcel iron for texturizing and curling
• Natural bristle brushes for wax and tattoo color
• Pinking shears for precutting the excessive lace
Products in the photo of Erwin’s workstation (Figure 9.22):
• Mustache wax or stronger hair wax
• Plastic sealer in pump bottle or a strong, fast-drying hair lacquer
• Tattoo color for detail work on finished beard
• 99 percent alcohol
• Lace pieces

