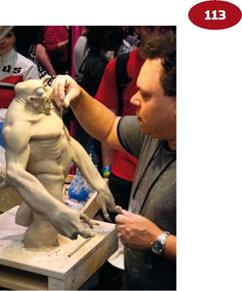
There is no set number or type of tools to use for sculpting your makeup. That, I imagine, is pretty obvious. What might not be obvious are the tools themselves. They could be expensive store-bought tools; they might be homemade jobs or even found objects. I’m sure Jordu Schell and Mark Alfrey have sculpted entire heads with nothing more than a Popsicle stick. In fact, I’ve watched character designer Jordu Schell create a creature sculpture from start to finish in less than a full day, and it looked great!
If you’re interested in some DIY sculpting tools, they’re very easy to make and inexpensive. Go to your favorite hobby store—mine is Caboose Hobbies in Denver (perhaps the biggest and best model railroad store on the planet!) —and pick up some 1/8-inch (3 mm) or 3/16-inch (4 mm) brass tubing (or steel, or aluminum) and some 1/32-inch (1 mm) wire; then swing by Guitar Center or Musician’s Friend and buy an inexpensive set of heavy guitar strings —they can be acoustic or electric. One last stop at Ace, True Value, Lowe’s, or The Home Depot for scroll-saw or band-saw replacement blades.
You will also need a few tools to help you make your new sculpting tools:
|
|
figure 4.4


 Homemade sculpting tools: brass tubing and guitar string. Photo by the author.
Soldering torch Solder
Pliers Wire snips
Dremel® with a cutting wheel Bending pliers
1. Cut the tubing into 4/- or 5-inch (11.5 cm to 12.5 cm) lengths with the Dremel®.
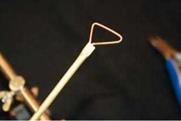
2. For a rough loop, cut a length of the low E string (the fattest wound string) about 2/ inches (6.35 cm) long and bend it into a triangular shape. Cut another length the same and bend it into a U shape.
3. Fit both ends of one piece of the bent wire into one end of the 3/16-inch (5 mm) tube and make sure it’s in as far as you want it; you do not want it to be so far out that you will risk bending and breaking it off at the tubing when working with it later. Crimp the tubing shut around the guitar string with your pliers and solder it in place. This will also add strength at the join point. Repeat for the other end with the other piece of E string.
4. For other loop tools, use the 1/8-inch (3 mm) tubing and the other guitar strings, repeating the process in Steps 1-3. Create whatever shapes you need for carving, blending, and shaping.
5. ![]()
![]()
To create a rake tool using the saw blade, you will need to heat the blade with your soldering torch so that the blade will not snap as you bend it. Bend the blade slowly (so that it won’t snap) into the curve you want for it. Then cut it with the wire snips or the Dremel. I shouldn’t have to remind you to wear safety glasses when you’re using the Dremel, but I will anyway. Wear safety glasses!
6. Stick the ends of the bent blade into the tubing, crimp, and solder. You might need to file down some of the blade’s teeth to fit into the tube end if the blade is too big. You can do that with your Dremel.
7. Another tool that could come in handy is what I call a wrinkle rake. It consists of several pieces of guitar string stuck into the ends of a 1/8-inch (3 mm) piece of tubing, crimped, and soldered. This is a terrific tool for creating lip wrinkles, eye wrinkles, and any number of various creases and wrinkles on the skin.
The most common tools you will use for your sculpture are rakes, wires (loops), steels (scrapers), and hoggers. Rakes are serrated tools used for removing clay efficiently. Wires or loops are useful for intricate detail work and don’t need much pressure to remove clay from the sculpture. Steels or scrapers are used to smooth out the sketched-in clay that has been raked. Some steels also have serrated edges and can be used as rakes to blend bits of clay, removing unwanted highs and lows on the clay surface. Hoggers are essentially large wire tools— more blade than wire—used for removing large hunks of clay. I use them mainly for cutting chunks of clay off the supply block to add to the sculpture.

