Up to this point we’ve been sculpting for age prosthetics; everything that has been done in the previous sections can be adapted to suit any type of character sculpture. That is true of this section as well.
Pull out some reference photos you have of old hands so that you won’t be working from memory. You could find it necessary to only sculpt up clay on the backs of the hands and part way out onto the proximal phalanx, or first


 bone of each finger, including the thumb. What you don’t create in clay to become an appliance you might be able to create with a wrinkle stipple technique I’ll discuss in Chapter 9.
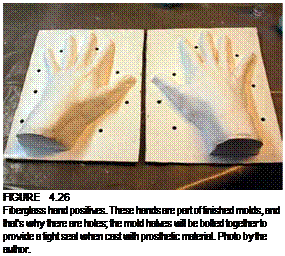
1. As with all sculpture, begin by placing small bits of clay onto the positive. You can work on both hands at the same time or do one at a time; it’s up to you. If the clay doesn’t seem to want to stick to the Ultracal, you can try brushing a thin layer of petroleum jelly into the stone first (if your positives are stone); then the clay should want to grab hold. This particular sculpt is on hands cast in fiberglass.
2. Loosely draw lines on the hand with a pencil that correspond to tendons and veins on the hand casts to make them more obvious for when you begin to place clay onto them.
3. Begin to place bits of clay on the cast where you’ve drawn enhancing lines. This is the roughing-in stage of the sculpture and can be done with just clay and your fingers.
4. You might want to use a small tool or two to help press the bits of clay together, but continue to place bits and pieces of clay—those little "sausages"—on the hands where you drew those pencil lines.
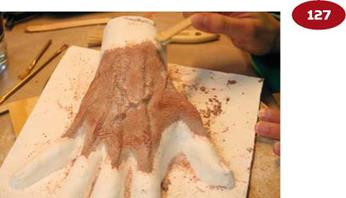
5. Continue adding clay and blending it until all the main features and shapes have been created and clay is everywhere that it needs to be. When the sculpture is roughed-in completely, you can begin to create the detail.
6. You need to refine your tool selection, picking tools that will allow you to create finer nuances in the sculpture. Try a medium rake tool or loop tool to go over the surface, creating areas of more definition.
7. Take the plastic bristle brush and go over the surface where you’ve been working with the rake and loop tools.
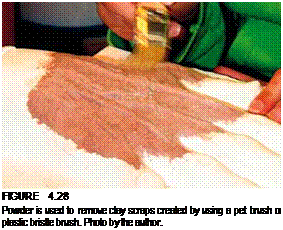
8. Create lines, but remove bumps and lumps and unwanted tool marks. The plastic bristle brush will likely leave bits of clay on the surface of the sculpture as you brush; you can get rid of these by lightly whisking them away with a cut-down chip brush and a little baby powder.
9. After you’ve applied solvent to soften the clay, use a smaller-detail brush to get into tighter areas of detail on the sculpture where clay slurry may have filled it in.
10. The clay will be soft for several hours until all the solvent has evaporated.
11. When the clay is firm again, brush powder over the entire sculpture where you had brushed solvent. Just as on the face and head, you’re going to
 |
 |
use the pet brush on the clay now. If the surface doesn’t have powder on it, all the tiny bits of clay will stick to the sculpture and might be difficult to remove.
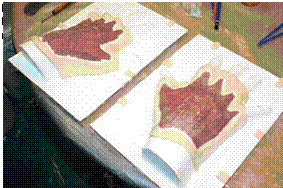
Make sure the edges of your sculpture are as thin as you can make them, and clean up any excess clay on the sculpture. You should now be ready to make molds of your sculpture so that you can cast your hand appliances.
