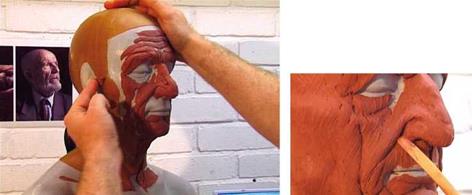
It can’t be emphasized enough that the process of sculpting prosthetics demands that the sculpture be defined by the face underneath. Someone, an actor, must wear it and emote through it. A certain amount of the work—the art of sculpting prosthetics—is a feel when something is or isn’t right, and that can only come about through practice—through the act of sculpting. A lot of sculpting. It should not be forced.
![]()

![]()
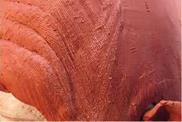 Since we are beginning to refine the sculpture, you need to refine your tool selection, choosing tools that will allow you to create finer nuances in the sculpt. You might want to try a medium rake tool or loop tool to go over the surface, creating areas of slightly more definition.
After you’ve gone over the sculpture to some degree, take the plastic wire brush (plastic bristles) and lightly brush over the surface where you’ve been working with the rake and loop tools. Essentially what you are doing is removing tool marks left by the loop and rake. Repeat steps 7 and 8; carve in some detail, then brush over it to remove tool marks. Create lines, but remove bumps and lumps and unwanted tool marks. The plastic bristle brush will likely leave bits of clay on the surface of the sculpt as you brush; you can get rid of these by lightly whisking them away with a chip brush.
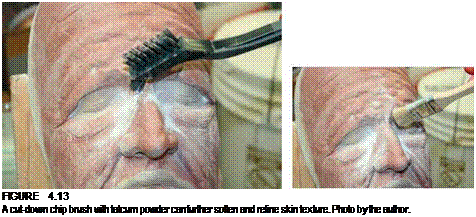 |
FIGURE 4.12
A plastic bristle brush can be used to soften harsh lines created by a pet brush raked across the clay. Photo by the author.
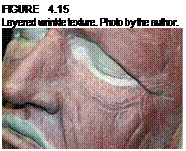
Skin texture is like skin coloration; it is multifaceted and multilayered. There is texture within texture within texture. There is depth to the wrinkles. Some are sharp, some are soft. Some are deep, some shallow. Skin wrinkles and creases are varied. Don’t fall into a trap of making all the wrinkles and folds the same depth or length. The more varied and nonuniform, the better. At this stage of the sculpture, you’re still using the equivalent of medium-grit sandpaper.
3. Pour some of the solvent into a cup and, with a chip brush, brush over the surface of your sculpture. The liquid will soften the clay; break down the surface to smooth out any blemishes. You will probably want to use a smaller-detail brush to get into tighter areas of detail on the sculpture because the partially dissolved clay becomes slurry and the chip brush could be too large to effectively get into the tighter spots and brush it out.
4. Some of the detail you created will likely soften too much with this step, so you will need to go in with one of your small loop tools and recarve that detail, then brush over it with a soft brush to take some of the hardness of the crease away.
5. Brushing lighter fluid or other softening liquid onto your clay will keep the clay soft for several hours, most likely, until all the solvent has evaporated. It might be advisable to let the sculpture sit overnight to ensure that the surface will be hard enough to work with again and not be too soft and sticky.
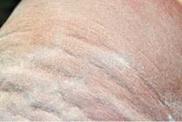
6. When you come back to it, brush talcum powder or baby powder over the entire sculpture where you had brushed the solvent to soften the clay. Why? Because now you’re going to use the pet brush on the clay. Notice as you run the brush across the clay that it creates and leaves behind lots of tiny beads of clay that the wires of the brush have scraped up.


![]()
If the surface doesn’t have powder on it, all the tiny lumps of clay will stick to the sculpture and be nearly impossible to remove. When the clay has been powdered first, you can take one of your chip brushes and whisk them away. I’ve even used pieces of stipple sponge to knock away these bits of clay. The powder also acts as a very mild abrasive that will allow you to take a chip brush that’s been cut down, making it a bit stiffer, and brush back over the lines created by the pet brush to soften them.
7. Some of the lines created by the pet brush might be a little too harsh, so you can go over those with the plastic bristle brush or a toothbrush and continue to refine and increase your detail in the sculpture, underlying texture. You should really be able to see the texture upon texture I mentioned after step 2. You’ll be adding pore texture shortly.
The texture of human skin varies across the face. The skin of your forehead is different, thinner, than the skin on your cheeks, which is different from the skin on your nose or your neck. This is why studying surface anatomy is very important to us as artists; we must work from a foundation of reality to create a realistic, albeit often stylized believability, in our makeup design and in our sculpture.
8. You can repeat steps 6 and 7 over and over again, even using a very small amount of solvent on the clay to brush out some detail and then create even more detail by carving with a tiny loop tool, powdering, and repeating the process again until the sculpture has the look and feel you are going for. Create fine lines, coarse lines, sharp lines, and soft lines and brush them each back in succession so that you have a skin texture with layers and layers of lines and wrinkles.
I can’t tell you when your sculpture is complete; only you can know that. However, you should be getting pretty close, which would be time to add some pore texture. One way to add pores is with a texture stamp. Brushing several layers of latex over an orange peel until you have a fairly thick piece of rubber with bumps on it is frequently used as a texture stamp; its pattern is somewhat random, but in actuality, for skin pores, I think it’s too uniform, and you need to do it by hand, without using texture stamps. By all means, experiment and make your own choice. There is no prescribed way to do this work; you must find methods that work for you and give you the results that you want, not what I or anyone else wants. Here I am merely presenting options and ways that I know work well.
Pores are not always uniformly round; some are deep and some almost invisible. Pores on the face are often an oval shape. They are elliptical and elongated. They also follow the direction of the skin. The same goes for facial hair or
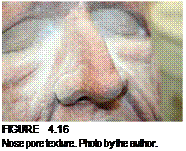
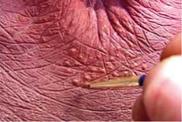 whisker follicles. These pores will all be sculpted by hand, and there’s no quick and easy way to do it except as carefully and as randomly as you can.
9. Pick one of your small tools, perhaps a small loop or a small burnishing tool, and begin making small indentations across the nose with the tip. Brush them back, softening them, then make some more. You can use a sharper tool, such as a toothpick, and poke it into your thick plastic that you’ve laid over the clay. Create varying depths of these pores. Then brush those pores back, making them softer. Repeat this process until you’re satisfied, then move on to another part of the face, such as the cheeks.
10. Because the pores need to follow the direction in which the skin is hanging, the elongated pores need to be vertical and not horizontal. Try it if you like and I think you’ll see that it just feels wrong. You might want to use a narrow tool such as a dental spatula poked into the plastic that can give you a very thin pore. When you brush them with powder and a chip brush, brush in the direction of the skin and the pores, not across. If you need to add more lines, do it. At this point you are creating almost the last bits of detail. Continue to add pores until you don’t need to add any more. Gently brush away any imperfections with powder and a chip brush.
11. Make a small container of clay slip or slurry by mixing some thin clay scrapings and some of whatever solvent you’ve been using. With this very loose clay you are going to create tiny bumps on the skin. In addition to lines and pores, there are small raised bits of skin. This step is not absolutely essential, but it adds to the overall texture of the sculpture and, under varying lighting conditions if the skin only has recesses instead of ridges and bumps, it won’t have the same effect or impact as if you take the time to add some tiny raised bumps on the skin, particularly around the chin and at the base of the neck.
The bumps will shrink as the solvent evaporates, and you might need to add more. The effect is well worth the time it takes to add this additional detail to your sculpture. Of course, how much of this you’ll be able to do will be completely dependent on how far you are able to sculpt on the neck.
12. The last step before molding your sculpture will be to make certain all your edges are as fine as you can make them.

Perhaps I should have mentioned this earlier, but I think it’s a good idea to turn the sculpture upside down and look at it from underneath. This is a good way to see if there is anything wrong with your sculpture that hasn’t been readily evident from looking at it normally, from above. Everything is probably fine, but better safe than sorry, right?
|
|
 |
|
|
|
|
|
|
|
|
![]()
![]()
|
FIGURE 4.20
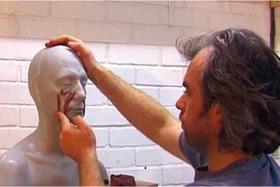
Neill continues to rough in the facial shape. Image reproduced by permission of Neill Gorton.
4. Create some rough ear shapes that you can put on and take off simply as a point of reference and to make the head look a little more familiar.
5. Once you’ve covered the head with a uniform thickness, use a serrated scraper to blend the surface and then smooth it all out, tying all the pieces into one whole.
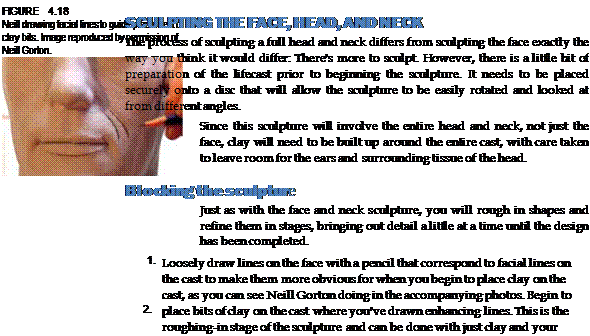
6. You might want to use a small tool or two to help press the bits of clay together, but continue to place bits and pieces of clay—those little "sausages" of clay—along the natural lines and folds of the face where you drew those pencil lines.
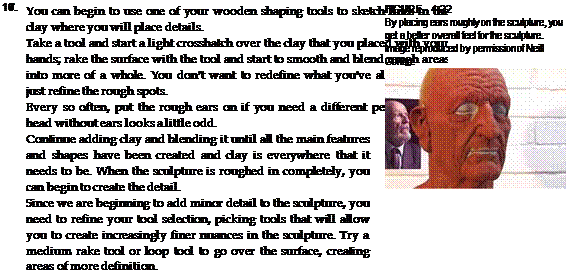 |
This is a still very early stage of sculpting, and it will start to take on the shape of your character. At this stage you can work fairly quickly because you are still just blocking out the overall impression of what it will eventually look like.
![]()
12. 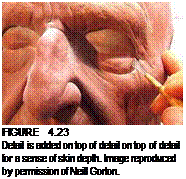
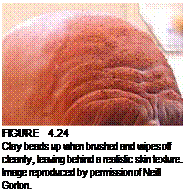
 After you’ve gone over the sculpture to some degree, take the plastic bristle brush and go over the surface where you’ve been working with the rake and loop tools. Essentially what you are doing is removing tool marks left by the loop and rake. Repeat steps 11 and 12; carve in some detail, then brush over it to remove tool marks. Create lines, but remove bumps and lumps and unwanted tool marks. The plastic bristle brush will likely leave bits of clay on the surface of the sculpture as you brush; you can get rid of these by lightly whisking them away with a chip brush and a little baby powder.
13. Lightly brush solvent over the surface of your sculpture so that you can smooth out any blemishes.
14. Some of the detail you created could likely soften too much or fill in with this step, so you might need to go in with one of your small loop tools and recarve some detail and then brush over it with a soft brush to take away some of the hardness of the crease.
15. You might want to let the sculpture sit overnight or have something else you can work on while you wait to ensure that the surface will be hard enough to work with again and not be too soft and sticky from the solvent.
16. Make sure the clay is firm again when you come back to it and then brush talcum powder (baby powder) over the entire sculpture where you had brushed the solvent. Now you’re going to use the pet brush on the clay. If the surface doesn’t have powder on it, all the tiny bits of clay will stick to the sculpture.
17. Make a small container of clay slip or slurry by mixing some bits of clay scrapings and some of whatever solvent you’ve been using. With this very loose slip you are going to create tiny bumps on the skin, just as you did on your face sculpture.
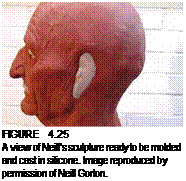
The effect is well worth the time it takes to add this additional detail to your sculpture. Anything worth doing is worth doing well, and it’s the little things that will help your work stand out from others who won’t make the extra effort. Make sure the edges of your sculpture are as thin as you can make them, and clean off any excess clay from the sculpture. You should now be ready to make a mold of the sculpture so you can cast your appliance.

