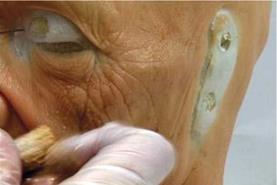
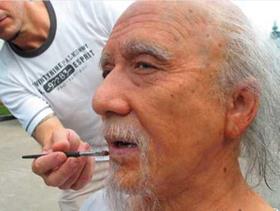
Painting prosthetic appliances can be handled in a variety of ways, and your method should be decided upon based on a combination of personal preference, personal style, the material of the appliance you’ll be painting, and whether you’ll be painting it prior to application, or after.
SiLiCONE
 |
 |
To save yourself time and paint, I suggest that your appliances be precolored at the time you cast them. Because the silicone we use for prosthetics is clear or translucent, it is an excellent material for intrinsic (internal) coloring. You can color the silicone with either a pigment that approximates the character’s coloring or with rayon fiber flocking material mixed to approximate the character’s coloring. Materials you’ll need:
An airbrush might seem to be a more practical and efficient way to paint an appliance, regardless of what material it is made of. It comes back to personal preference and how you were taught (or are being taught). For painting appliances, I believe you will be better off not using an airbrush and instead using chip brushes and cut-down chip brushes. Don’t get me wrong, I love airbrushes; I have six of them ranging in size from very fine detail to big enough to paint a house. But unless you have an assistant whose job is to keep your airbrushes clean and unclogged, you will spend more time cleaning your needles and nozzles every time you change colors, even if you are using several at a time. Airbrushes clog quite easily, especially when you (try to) run thinned silicone through them. I was taught how to get superb results using thinned RTV silicone adhesive and RTV silicone caulk as the medium for applying color to silicone appliances.
Now:
1. Start off by thinning the silicone adhesive (sealant) in a cup with some Heptane/Bestine® so that it is a pretty thin wash of about 10 parts Heptane to 1 part silicone.
2. Of course, you have a polyfoam (soft or rigid urethane foam) form of your model that the appliance is resting on to hold its shape and facilitate easier painting.
3. Brush this onto your appliance, but be careful not to paint all the way out to the edges. Because there is a lot of solvent mixed with the silicone, you can ruin the edges; the silicone will absorb the solvent and swell.
4. Since you seamed with silicone gel, this wash will also create a thin layer of silicone over the seam patch. This wash of silicone adhesive will kick very quickly, setting up in less than an hour and resulting in a very strong bonding surface for the color you will add next.
5. 
![]()
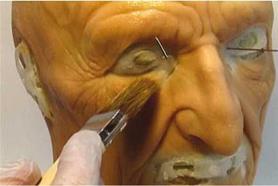 You can use either silicone pigments to make your flesh tones or whatever color you need for your appliance, or you can use artist oil paints, which will work just as well. These colors will be used as detail highlight and shadow coloring on various parts of your appliance.
6. Mix another thin wash of silicone, this time mixing Naphtha with some of the RTV silicone caulk instead of Heptane or Bestine® with silicone adhesive. The ratio is about 10:1—10 parts Naphtha to one part silicone.
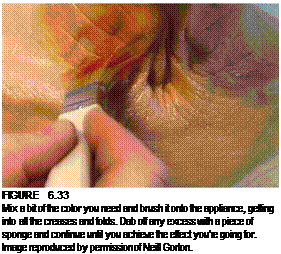
Mix a bit of the color you need and brush it onto the appliance, getting into all the creases and folds. Dab off any excess with a piece of sponge and continue until you achieve the effect you’re going for.
![]()
![]() Next take one of the chip brushes and cut the bristles down about halfway. The next step is to flick or spatter paint onto the prosthetic. This can be done by alternating heavy and light amounts. Mix another batch of silicone with Naphtha in the same ratio, and mix colors to complement the complexion you are creating.
Next take one of the chip brushes and cut the bristles down about halfway. The next step is to flick or spatter paint onto the prosthetic. This can be done by alternating heavy and light amounts. Mix another batch of silicone with Naphtha in the same ratio, and mix colors to complement the complexion you are creating.
With your fingers (wear nonlatex gloves), flick the brush bristles so that the paint spatters randomly onto the appliance.
Use another chip brush with longer bristles and tap it against the handle of the cut-down brush to apply spatter in a slightly different way, with different spatter amounts.
You could be doing this with an airbrush, but even when you remove the nozzle tip and reduce the air pressure, you will get a uniform random spatter. I know
|
|
![]()
figure 6.34
With your fingers (wear nonlatex gloves—nitrile or vinyl), flick the brush bristles so that the paint spatters randomly onto the appliance. Image reproduced by permission of Neill Gorton.
![]()
 it’s an oxymoron, but it’s true, and you don’t want anything that appears uniform. Be careful with the amount of color; it’s very easy to overdo it, particularly with reds.
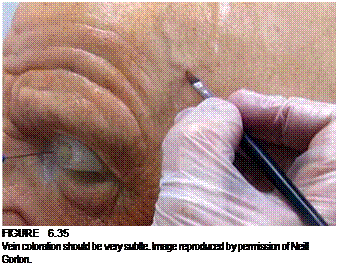
11. When youve spattered sufficiently, you can move on to adding vein color if it is appropriate to the prosthetic, dabbing with a sponge to remove excess color. Vein coloration should be very subtle.
12. You can continue to add color in the form of moles and age spots, if that is appropriate to the makeup, or you can stop and let the silicone paint cure, which will take several hours.
When the silicone has set, the appliance is ready for application. Then you can finish painting the appliance with an alcohol-activated color palette once the prosthetic is glued in place.
|
|
figure 6.36
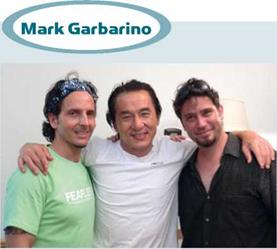
Mark Garbarino (left), Jackie Chan, and David Snyder in China for Forbidden Kingdom. Image reproduced by permission of Mark Garbarino.
Mark has racked up a 20-year-plus career as a creator of sculptures, costumes, puppets, and special makeup effects. After moving to Los Angeles in 1987, Garbarino began specializing in the area of special makeup effects, contributing puppets for such films as The Abyss, Nightmare on Elm Street, Hot Shots 2, Virus, Hellraiser 4, and Bicentennial Man.
His makeups have appeared on Madonna and Busta Rhymes in their music videos and on Jim Carrey in print work. In the 1990s, as special makeup effects coordinator, Mark’s team won Emmy Awards for the television series Babylon 5 and Buffy the Vampire Slayer. Mark was honored with an individual Emmy nomination in 1997 for Babylon 5, for Outstanding Makeup for a Series, and again in 2003 for prosthetics on Six Feet Under.
Mark was also nominated for the Local 706 Hair and Make-Up Awards for Best Prosthetics, transforming John
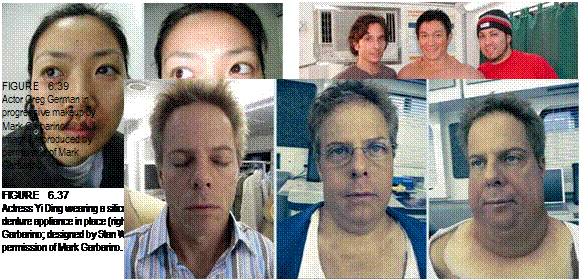
Voight into Howard Cosell for the film Ali. Other film makeup highlights include The Nutty Professor2, Pearl Harbor, Artificial Intelligence, Pirates of the Caribbean, and Constantine. International film experiences in Hong Kong and China include Home Sweet Home (Karina Lam), Running on Karma, Kiddult starring Andy Lau, Tak-wa, Eyes 10, Jet Li in Fearless and Ci Ma, and Jackie Chan in The Forbidden Kingdom.
Mark has taught special makeup effects at the Shanghai Theater Academy but continues to maintain his home in Los Angeles. Mark’s plans include working more in Asia and expanding the character makeup possibilities for China’s film stars.
|

