To inject silicone into your mold, at least two holes must be drilled in the mold positive: one to inject silicone through and the other to allow air to escape as the mold fills. The syringe for injecting the silicone should be made of polyethylene or polypropylene and should not have a latex rubber end on the plunger; that would cause platinum silicone inhibition—it won’t cure. Make sure the mold pieces have been thoroughly released, including the injection hole and the vent hole.
1. Release the mold pieces.
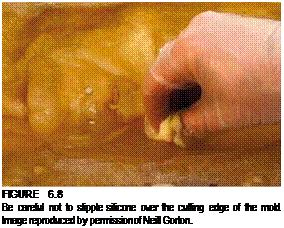
2. For creating a GFA, brush or stipple a thin coat of mixed silicone encapsulator material on both halves of the mold, positive and negative. Be careful not to stipple silicone over the cutting edge of the appliance mold.
3.
 |
 |
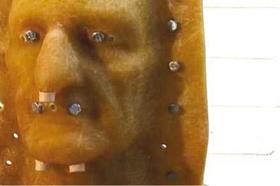
When the encapsulator material begins to set, close the mold and clamp or bolt securely together.
figure 6.9
Hand-tighten the bolts first and then tighten them with a wrench. Image reproduced by permission of Neill Gorton.
![]()
4. Allow the encapsulator material to fully cure inside the mold. You might want to accelerate the cure by applying heat. As a rough guide, the recommended cure schedule for a 1-inch-thick Ultracal mold is 2 to 3 hours at 200°F (93°C).
5. Allow the mold to cool.
6. 

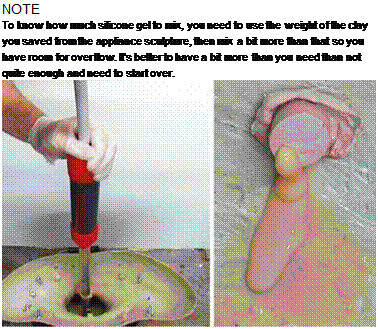
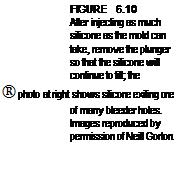
Mix the gel components together and add pigment and/or flocking, then de-air them in an evacuator (vacuum chamber); or simply let the air bubbles rise and disperse on their own (only if you’re using a slow-cure gel). Fill the syringe with the gel and slowly inject it through one of the holes until it begins to come out the second hole.
7. Carefully remove the syringe and gently tap the mold, and tilt it to work any remaining air through the holes.
8. Reinsert the syringe and top off the mold with gel if necessary.
9. Allow the gel to cure at room temperature for 24 hours (or as long as the manufacturer recommends) or place it back into the oven for 1-1% hours at 200°F (93°C) for the gel to cure. Allow the mold to slowly cool enough to handle (90-100°F/32-37°C)—if the mold is gypsum, it may crack if cooled too quickly—and carefully demold the appliance. Wash off any release residue and trim the injection and bleeder sprues.
10. Cover the trimmed sprue points with fresh encapsulator material and allow it to cure. Then powder the appliance; it is ready for painting and application.
You should store your appliance in an airtight plastic bag if it’s not going to be used in the near future. For painting, it would be handy to have a duplicate of the positive for the appliance to lie on or a generic positive so that the prosthetic will have the relative shape it is supposed to have.
You do not have to be making a gel-filled appliance in order to inject silicone. Injecting silicone merely ensures that you will have an easier time filling a more complex mold shape. The steps are the same, minus the encapsulator.
