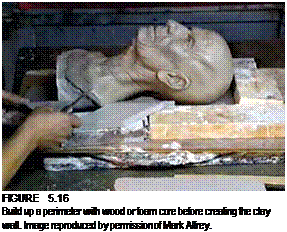
There is another way to do a wall for your sculpture: It can be done with your sculpture laid flat instead of standing upright.
1. Cut enough clay (about % inch—12 mm—thick) to lay your sculpture on face up. Cover the clay with plastic wrap to keep the clay from sticking to your sculpture. The clay is to prevent the sculpture from denting by being laid on a hard surface.
2. Place your sculpture on the plastic-covered clay. If you are working with just a face sculpture, you might not need or want to try this method; it works well for a full head (360o) sculpture. On the other hand, if you have only a face sculpture, it must be laid flat, facing up, because it would be awkward at best to try to mold it in an upright position.
3. So that you don’t wind up using more WED or other water clay than you need to, you can first build up around the perimeter of your sculpture with precut lengths of 2 x 4-inch and 1x 2-inch wood, or you can build platforms using pieces of Vs-inch (1 cm) foam core and a hot glue gun.
4. 
Once you’ve built a perimeter using either wood or foam core, proceed with your clay just as described in steps 1-5 in the preceding section, following a line around the sculpture that will prevent undercuts that would keep the front and back halves of the mold from separating.
Once you have made it through spraying Krylon Crystal Clear and Dulling Spray, you are ready to begin applying a thin coat of Ultracal for your detail layer. You should have all your supplies laid out and ready to begin, even before you start to
build the clay wall around your sculpture. If you wait until you’ve already done the dividing wall before getting everything you need to make the Ultracal mold, the clay could already be drying out to the extent that you can see separation at the contact point on the sculpture due to shrinkage that occurs when the clay dries. You don’t need to work fast, but if you have all your tools and materials handy and ready to go at each stage, you won’t need to rush and won’t forget important steps as a result.
