Ken Diaz knows the importance of realistic blood. Finding nothing on the market that worked under the many different shooting conditions, he created his own. Ken:
“There always are several factors to take into consideration when creating a makeup. First, you need to determine what type of wound you are creating.
Does the wound have arterial or vascular bleeding? With arterial bleeding, the blood is oxygen enriched and bright in color. With vascular bleeding, the blood is oxygen depleted and dark in color.
How old is the wound? Is the blood dry or starting to dry? Many times you will
have a combination of all three types of blood in one makeup. For example, the center of the wound may have bright, oxygen-enriched blood. As you move away from the center of the wound, the blood would become oxygen depleted and darker. As you move to the outside edges or on smudges, the blood would be dry or starting to dry. Weather elements and onset conditions can also affect the wound.
Is the actor sweating? Is it so cold that the blood is freezing? Is it raining out so the blood could wash away? To get really good at dressing blood to wounds, you need to start thinking organically. Do your research and study medical books. Watch and record true-life medical-emergency shows, boxing, and full-contact matches. Take photos of real-life injuries.”
The following are blood conditions and what to use.
Lighting Conditions
When filming in low light, dark-colored bloods will not show up. You need to use a brighter-colored blood for it to be visible. Also use bright-colored blood when applying the blood to any dark surface. The opposite is true when working with light – colored surfaces. Dark-colored blood looks much more realistic on white porcelain than does bright-colored blood.
Blood Viscosity
There are now many blood products available that come in a variety of viscosities or thicknesses.
Heavy: A very heavy or paste consistency blood (such as K. D. 151 Blood Jam) is used
![]()
![]()
 when a nonflowing blood is needed. This type of blood can be applied with a dental spatula, and works very well when used at the base of cuts. You can create very realistic scratches with this type of paste – consistency blood when applied with a coarse stipple sponge.
Less Heavy: A slightly lighter-viscosity blood (such as K. D. 151 Blood Jelly) should be used when a slow-moving blood is desired to help maintain the continuity of a bleeding wound from take to take.
Medium: Medium-viscosity bloods are the consistency of syrup. These are probably the most commonly used type of blood. Some of these bloods have been formulated for specific uses.
Light: Light-viscosity bloods (such as K. D. 151 Pumping Blood) can be used when matching the viscosity of real blood. Also are good to use when pumping blood through small-diameter tubing.
To create a thinner, realistic dry or drying blood, you need to use a medium-viscosity drying blood (such as K. D. 151 Drying Blood Syrup). When a thick, realistically dry or drying blood is required, you need to use a heavy-viscosity drying blood (such as K. D. 151 Drying Blood Jelly).
When applying blood over prosthetic appliances, you will need a blood that contains a wetting agent (such as K. D. 151 Flowing Blood). Blood that contains a wetting agent will help keep the blood from beading up over slick surfaces.
Working outside with conditions that could be hot, cold, or windy, theatrical bloods
tend to have an unrealistic skin that forms on the surface. Applying a little bit of glycerin over the top of the blood keeps it looking fresh and wet. To help avoid this problem, you can use a blood that already contains a glycerin base (such as K. D. 151 Stay Wet Blood).
Mouth Blood
Blood that runs into the mouth should be specially formulated (such as K. D. 151 Mouth Blood).
Always keep a small can of shaving cream in your kit on-set. Shaving cream removes stains on the skin ranging from blood to permanent markers. It is fast and easy.
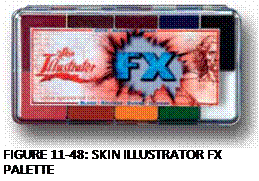
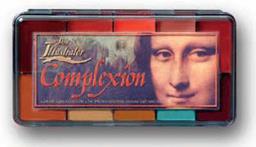
There are products out there now that make all the difference in continuity and how a blood effect can be used, without the mess involved with cleanup. Skin Illustrator, developed by award-winning Makeup Artist Kenny Myers, is a water – and abrasion – resistant, alcohol-activated makeup that is available in palettes and liquids. Makeup products such as Skin Illustrator are a must-have in your makeup kit. Throughout the book, we mention different Skin Illustrator palettes, and for now, we’ll talk about the Skin Illustrator FX Palette and a few ways it is used in blood effects (Figure 11.48).
The FX Palette was designed for just about any injury or illness imaginable. The Skin
By taking the aged blood and adding it to any of the other colors in the palette, you will get a whole new range of color.
 For Continuity: If you have an actor with dripping blood, and you’ll need to do the shot over and over again, you’ll want to keep track of exactly where you applied the blood the first time or at the beginning of the take. Between each shot, there will be a few moments to clean up the actor so you can start fresh again.
|
|
|
|
|
|
|
|
|
|

![]()


![]()
![]()
Shooting the stuntwoman to match became an issue when wet blood was to be applied. The Costume Designer did not like the idea of the mess that wet blood would make, and the amount of wardrobe that would be used. The solution was to use blood trails made of Skin Illustrator colors, which, on camera, looked just like real blood. Add a little shine on top of the Illustrator color with KY Jelly. This is a product that will maintain its shine without lifting.
Everyone was happy with the results of not having to use wet blood on the stunt driver. Saves you from having to run in over and over again to clean and reapply blood. With this in mind, you can see why distance shots, working in the rain or elements outside, painting your wound for a more three-dimensional look, and keeping continuity are all good reasons to use Skin Illustrator FX Palettes in your work.
PRO TIP
Other products you can use to get the same effect as FX Skin Illustrator: Stacolor and Reel Color.
|
|
by Christien Tinsley, creator of Tinsley Transfers, Inc.
When approaching a tattoo job, research is always important. You have to consider the character and the character history and time line to where and when they got the tattoo.
Also, with so many themes and mixture of themes, having a good direction or vision
from the Director can be helpful in scaling down the possibilities. Let’s not forget that tattoos are symbols and representations sometimes of more than just expressive art. Sometimes there are meanings with deep ties to them, and the last thing you want to do is have your actor with something that is offensive or says something about himself that isn’t in the character’s description. Tattoo books, magazines, tattoo parlors, photography books, and the internet are all good sources to find thousands of ideas.
Today, in feature films and TV, the techniques of HD, bluescreen, and greenscreen are being more commonly used. The trick to a good makeup, tattoo, or prosthetic is to make it look real. If you can fool the eye standing two feet away, you will most likely fool the camera. Don’t rely on video monitors—they can be misleading and not a true image for corrections.
Make sure you have a good relationship with the Director of Photography. In HD cases, there are digital DPs (not Video Assistants) monitoring the recording. Go to dailies. Ask to see them even if they give you a DVD copy. Know what you are looking at. Find out from the Director or DP how they are processing the film in post, so you can be aware if you need to punch up certain colors. There are no disclaimers in film and television for a Makeup Artist.

