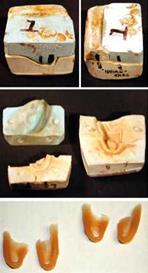
1. 
 Take the ears you cast in Chapter 3 and begin placing small bits of clay onto them. Have your reference images handy so that you can sculpt from them. Remember that if the clay doesn’t seem to want to stick to the Ultracal, you can try brushing a thin layer of petroleum jelly into the stone first; then the clay should want to grab hold.
2. Ear skin is very thin and is textured differently than skin elsewhere on the head, at least above the earlobes. For the most part, the skin covering the ears is smooth, including the earlobes. Begin by filling in the areas around the triangular fossa, schaphoid fossa, and meatus, with clay to eliminate the undercuts, and sculpt a new tip onto the helix.
You might find it easier to work on both ears simultaneously than one at a time; that way you can compare as you go.
3. Decide whether you’re going to create ears with attached lobes or free lobes; in Chapter 2 I mentioned that most people have free lobes by a margin of nearly 2 to 1. Will your character have gauged lobes, that is, a large hole which objects can be stuck through? That could be interesting; so would the mold. Remember that every cool design has to be mold – able, and I mean moldable in a time and cost-efficient way; otherwise, the design may not work.
4. Once you have your new ear shape roughed in, you can begin to smooth the clay and blend the edges off to nothing. Use solvent to soften the clay, then smooth the clay with a soft brush. After the solvent has evaporated and the clay has hardened again, you will be able to carefully create the molds for the ears.
chapter summary
Chapter 4 introduced you to methods for sculpting prosthetic appliances in sulfur-free, oil-based clay, the purpose of WED clay, and useful sculpting tools, even how to make your own tools. You also learned how to prepare your finished prosthetic sculpture for molding, which will be covered in Chapter 5.
This page intentionally left blank
■ Tools and materials
■ Releases and sealers
■ Making the negative mold
■ Keys, flashing, and cutting edge
■ Types of molds
Breaking down the sculpture is the process of determining the way a complex makeup must be separated for mold making and preparing it properly for the mold-making process. Not all makeup sculpture will need to be broken down, but molds will always have to be made, and this chapter is all about preparing the sculpture for mold making and then making the molds. There are different types of molds, each with its own design concerns. I forget who told me this, and I apologize for not attributing the quote, but "Good molds aren’t made, they’re designed."
|
