by Smooth-On
Many products on the market are used for mold making. Most use a variety of flexible rubber products. These products can mimic fine details, are easy to remove from the original piece being cast, and can be used over and over again, which makes these products cost effective. The following rubber products are often used by Makeup Artists.
Latex: A natural rubber found in rubber trees, mainly in Southeast Asia. Raw rubber is processed with ammonia and water to make the rubber usable as a molding material. Latex is often brushed or slushed into a mold, but not poured. The advantage of using latex is that you don’t have to weigh the product. You can use latex right out of the container. It’s not too expensive, and has a high elasticity. Latex molds are also good for casting wax and gypsum. The disadvantage of latex is the drying time. Most latex products need to dry for four or more hours between each layer when being brushed on. Some projects can take up to 20 brushed layers. Also, there can be a strong ammonia odor, but there are products out there today that have addressed this problem.
Silicone Rubbers (Smooth-Sil Series):
Silicone rubbers are two-component systems, and are available in ranges of hardness from very soft to medium. Silicone can be cured with a platinum catalyst or a tin catalyst. You can make molds that are poured, brushed, or sprayed onto a model. Silicone can have negative results when
 |
|
 |
|
If the mold has soft spots (partial cure):
1. It was not mixed correctly (premixed).
2. It was not mixed thoroughly.
3. The product was contaminated.
4. It was not correctly measured.
If your mold stuck to the model:
1. The wrong release agent was used; not enough was applied; or it was not used at all.
2. The model was not properly sealed.
1. An original model can be made with almost any material. This includes clay, wax, wood, plaster, stone, metal, bone, or cement.
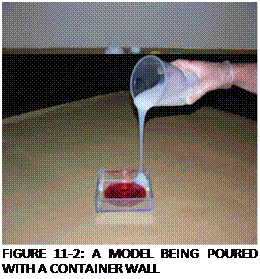
2. If you are pouring, use a container wall around your model (Figure 11.2). If brushing, no wall is needed.
3. Seal all areas of the mold and model if using porous materials: plaster, wood, sulfur, or water-based clays.
4. ![]() Use a release agent for all sealed areas. If you are using silicone, a release agent is not necessary.
Use a release agent for all sealed areas. If you are using silicone, a release agent is not necessary.
5. Follow manufacturer directions suited for your project.
Have good ventilation. Do not inhale fumes, rubber products, release agents, sealers, fillers, resins, and plasters, and so on. Wear good rubber gloves, and minimize skin contact while working. Wash your hands with soap and water, or anywhere there has been contact with products.
Protect your surfaces from spills with wax paper, brown paper, or your own favorite setup towels. Keep your station clean by keeping utensils clean, and surfaces washed with acetone or alcohol to remove any materials that have spilled. Gelatin can be simply washed off.
What should you have in your kit for mold
making? Smooth-On suggests the following:
Wood or acrylic pieces for container walls (this is for containing any product from spilling over). Mold boxes can be homemade.
Scale
Modeling clay Mixing containers Stirring sticks Sealing agent Release agent
Mold rubber or molding material of choice
If you find that your mold did not set properly, it could be for one of the following reasons:
1. Wrong mixing measurements
2. Wrong type of scale (should be a gram scale or triple beam balance)
3. Temperature too cold
Steps to Silicone Mold Making with Smooth-On:
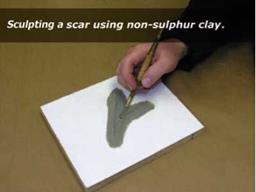
1. Sculpt (Figure 11.3).
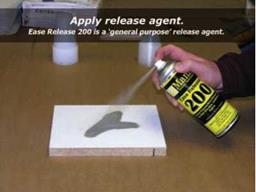
2. Release (Figure 11.4).
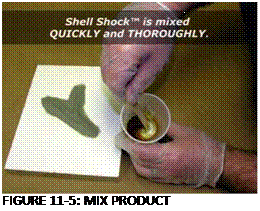
3. Mix product (Figure 11.5).
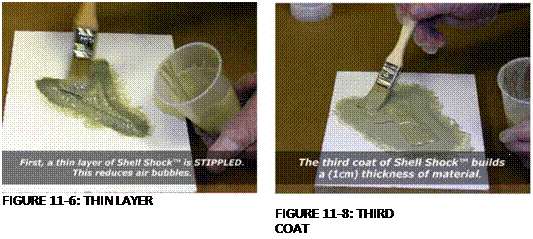
4. Apply thin layer (Figure 11.6).
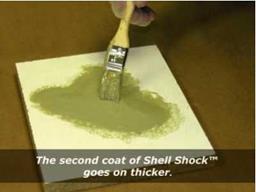
5. Apply second coat (Figure 11.7).
|
FIGURE 11-3: SCULPT |
|
FIGURE 11-4: RELEASE |
6.  Apply third coat (Figure 11.8).
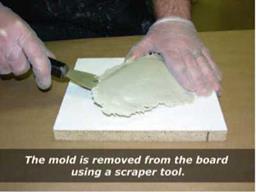
7. Remove mold (Figure 11.9).
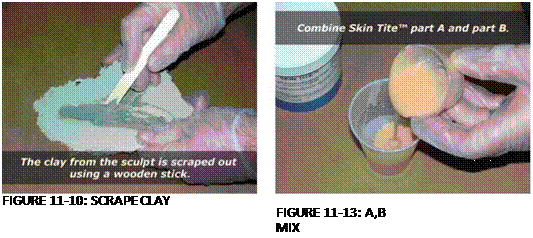
8. Scrape clay (Figure 11.10).
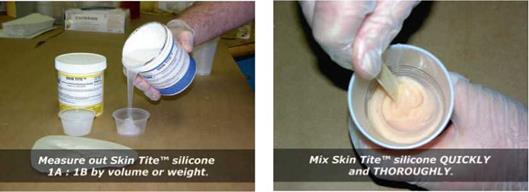
9. Measure out (Figure 11.11).
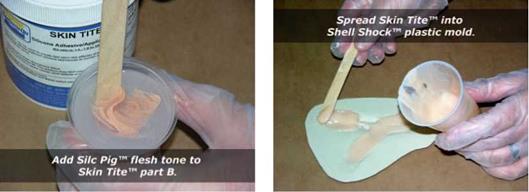
10. Mix flesh tone (Figure 11.12).
11. Mix (Figures 11.13 A and B).
12. Mix quickly (Figure 11.14).
13. Spread in mold (Figure 11.15).
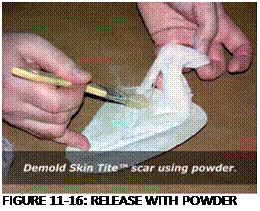
14. Release with powder (Figure 11.16)
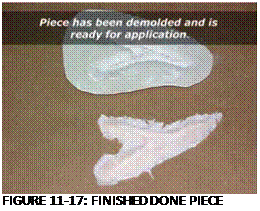
15. Done (Figure 11.17).
|
|
 |
|
|
|
|
|
 |
|
|
|
|
|
FIGURE 11-11: MEASURE OUT
|
FIGURE 11-12: MIX FLESH TONE
You should know the following terms as they pertain to mold making and appliances:
Adding Color: Mixing pigments or flocking materials to a product before being cast into a mold.
Alginates: Seaweed-based products used to take an impression of an object or person to be used in mold making.
Chavant NSP Clay: Sculpting clay that holds fine details, sculpture free
and available in soft, medium, or hard grades.
Casting: A product being used in a mold to create molded reusable appliances.
Cure: A chemical reaction that occurs when you mix two ingredients together that finish.
Cure Inhibition: Certain casting products can be inhibited by contaminants used in or around a work area, causing the molded product to remain tacky or not to cure.
Demolding: When your product has cured enough to be taken out of the mold.
Green Marble SeLr: Makeup sealer, used in aging techniques and for multiple layers.
KRYOLAN Crystal Clear: Protective coating with clear finish that doesn’t yellow.
Myristate: An additive for high-grade cosmetics. Also used as an emulsifier or moistening agent.
Mix Ratio: The proper mix of products.
Plastics: Products such as W. M.Creations, Inc. A. M.E. K. based liquid plastic. Not to be used directly on the skin. Use in stone or silicone molds.
Pot Life: How long the product mixed will last for usage.
Pros-Aide: A prosthetic adhesive that can be mixed with acrylic paints. Has a strong bond.
Pros-Aide Bondo: Pros-Aide mixed with Cabosil.
Platinum Cure Silicone Rubber: Abrasion and heat resistance in a versatile product for
![]() Throwaway brushes
Throwaway brushes
Liquid soap such as Ivory clear soap
Pros-Aide Bondo
W. M. Creations, Inc. Soft Sealer
Medical mixing cups
Chavant NSP Clay
Sculpting tools
Steps to Silicone Mold Making:
1. Set up your station, Make sure there are no latex gloves or sponges near the work area. Wash your hands and lay down setup towels (preferably paper towels).
2. Sculpt the desired form out of Chavant NSP clay (nonsulfur clay). Spray the clay with one light coat of Krylon Crystal Clear, and dry thoroughly (about three minutes). Mix the silicone material (Third Degree molding material or Skin Tite by Smooth-On). These two products are platinum-silicone based, and are affected by latex or sulfur products.
Paint the silicone material onto the sculpture with a finger or throwaway brush, making sure not to trap any bubbles in the cast. Build the material up at least 1 inch to avoid warpage. Let dry at least 30 minutes, then demold.
What to Pour into the Mold
Suggested materials that can be poured into
the mold would be plastic, Pros-Aide
Bondo, and silicone products.
Applying the Finished Prosthetic:
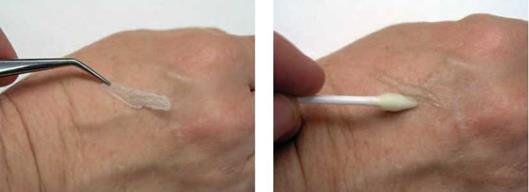
1. Set the appliance in place on the skin area, holding tweezers if necessary (Figure 11.18).
|
 |
|
FIGURE 11-18: STEP ONE
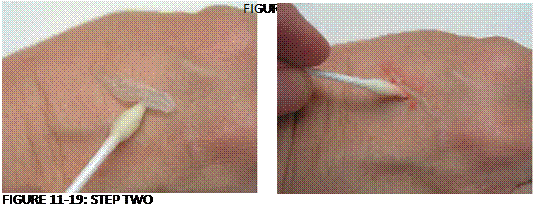
2. Applying a small amount of 99 percent alcohol under the appliance with a brush or cotton-tipped applicator, let the appliance blend (melt) into the skin (Figure 11.19).
3. Blend off any soft sealer edges with 99 percent alcohol (Figure 11.20).
4. Color with Stacolors, activated with 99 percent alcohol (Figure 11.21).
5. Paint with cut example (Figure 11.22).
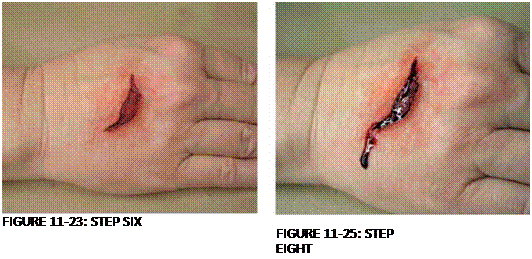
6. Finished painted cut (Figure 11.23).
7. ![]()
![]()
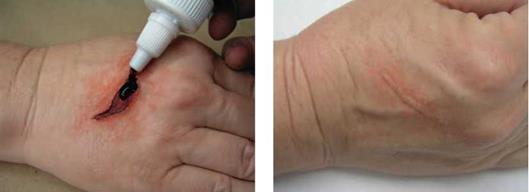
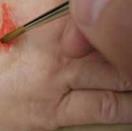 Adding blood (Figure 11.24).
 |
|
|
|
|
|
FIGURE 11-26: STEP NINE
8. Cut and blood (Figure 11.25).
9. Finished scar (Figure 11.26).
10. Seal with a soft sealer if necessary.
When an appliance is translucent, there is a realistic quality that shouldn’t be painted over. Stacolors, which are activated with 99 percent alcohol, give you the flexibility to paint in thin layers like a wash (translucent)
or opaque (dense so it cannot be seen through). Apply Stacolor with brushes, sponges, or cotton-tipped applicators. Stacolors also come in liquid form, which you can use in an airbrush without having to thin the product first.
Remove products with Isopropyl Myristate, Super Solv, or baby oil. Clean skin first with 70 or 90 percent alcohol. Do not use near
the eyes.

