A basic gelatin formula (you will notice that the following recipe does not have Sorbitol, white glue, or zinc oxide—do some experimenting—a good makeup effects artist must be part mad chemist):
You can double, triple, or quadruple this formula. Very small batches aren’t as easy to mix as a medium batch, which this describes; but once you’ve mixed a medium batch, you can take smaller amounts from it and use them in small molds.
I can’t for the life of me remember where I got this particular formula. Let me know if it’s yours and I’ll make sure you get credit in the next edition.
160 grams (1/4 cup) glycerin (U. K. glycerol)
40 grams (1/8 cup) gelatin (U. K. gelatine)
1 gram (1 tsp) quick rise yeast 3.5 grams (3.5 tsp) distilled water
Pigment color of your choice (you can also use colored flocking, food coloring, or powdered cake makeup)
![]()
1.  In a microwave-safe bowl, pour the glycerin. Slowly add the gelatin granules to the glycerin. If you are adding a pigment, mix the pigment into a small amount of glycerin before adding it to the batch. Heat the glycerin and gelatin in the microwave for a minute or two, in 5-10 second increments, being careful to prevent bringing the gelatin to a boil. If the gelatin boils, the collagen in the gelatin will be destroyed and you will need to start over. Gelatin melts at about 70°C, or close to 160°F, depending on altitude.
2. When the gelatin has completely liquefied, pour the gelatin into a plastic quart cup. Let the gelatin cool completely (you can put it in the freezer or refrigerator; you’re essentially making Jell-O®), then remelt the gelatin in the microwave three or four times—again in 5-10 second intervals so it won’t boil—to ensure that all the water has evaporated from the glycerin, to minimize shrinkage of the finished appliance.
3. Before going on to the next step, apply a very thin layer of petroleum jelly, vegetable oil (PAM®), or Epoxy Parfilm onto both the positive and negative of your mold as a release agent so that the gelatin won’t stick to the mold surface when you demold your appliance.
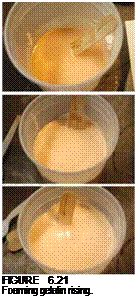
4. When you’re ready to cast your appliance, mix the yeast with the water Photos by the author. and let this mixture sit for at least 2 minutes; melt the gelatin, being careful not to let it boil, then add the yeast and water mixture, stirring it into
the melted gelatin. It will immediately begin to foam.
5. Stop stirring and let the gelatin mixture rise until it stops, then stir well with a large craft stick to refine the gelatin—that is, to remove large air bubbles and to make the foam mixture consistent. It should be the consistency of meringue. If the gelatin cools too much, reheat it briefly so it is pourable.
Like foam latex, foamed gelatin can be poured or injected into a mold.
Instead of using the water/yeast mixture to make the gelatin foam, you can substitute a small amount of vinegar and/or baking soda to achieve the same result. Ascorbic acid powder (vitamin C) will also cause a foaming action. You do not have to foam the gelatin to achieve an excellent appliance. It is presented as an option, albeit a good one, I believe. Gelatin can have some weight to it (though it’s still lighter than silicone), and foaming the gelatin will make it lighter by using less material.
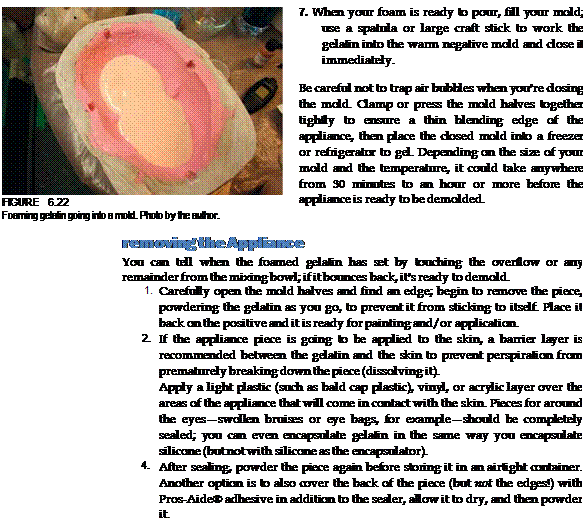
6. It is a good idea to heat the negative half of your mold in a warm oven until it is warm to the touch. This is an optional step, but it could provide a better appliance surface. The positive can be either heated or chilled prior to foaming your gelatin. If chilled, it should be cold to the touch but not frozen. The goal is to speed up the gelling time. Pouring warm foam into a frozen mold, or even a cold one, could crack it, which, as you can imagine, would be bad. Experimentation will dictate what is best.
![]()
 |
|
|

![]()
Do not let the gelatin boil (bubble or foam); that will burn the gelatin, causing it to change color and leave bubbles in the finished appliance.
3. Gently swirl and jostle the mixing container to get rid of any air bubbles in the gelatin.
4.
 |
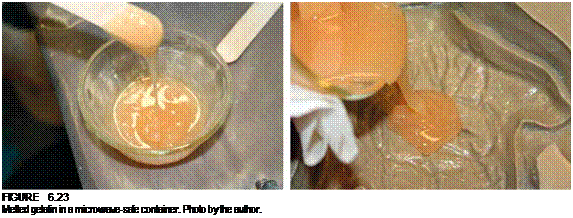
Carefully pour the gelatin into the warmed mold, holding the container as close to the mold surface as possible.
figure 6.24
Slowly pour gelatin into the mold from near the mold surface. Photo by the author.
Pouring from higher up may cause the formation of air bubbles becoming trapped (with silicone, pouring from higher up causes air bubbles in the silicone to stretch and break).
5. Tilt the mold from side to side, allowing the gelatin to coat the surface of the mold and allowing air bubbles to escape.
6. Press the positive into the negative and close the mold tightly.
7. Allow the gelatin to cool and set up.
8. Carefully remove the positive, trying to keep the appliance in the negative. If there are bubbles, they will be easier to repair if the gelatin is still in the negative.
9. Trim around the flashing at the cutting edge and powder the inside of the appliance.
10. Carefully begin to peel up an appliance edge and gently remove the piece, powdering as you go. Powder both sides of the appliance.
I’ve already suggested that you take some time and experiment with gelatin because it is quick, easy, and inexpensive. What’s also cool about it is that if your appliance turns out badly in the mold, you can simply clean out the gelatin, remelt it, and pour it again! There is a caveat, however: Eventually the collagen in the gelatin will begin to break down from the repeated heating, but in the learning stages, that doesn’t really matter, since you probably won’t be making an appliance for a major project while you’re just learning how to do gelatin well (I hope).
![]()
You will notice that the two formulas/recipes for gelatin I gave you are quite different; I can’t say that one is better than the other (Matthew Mungle, however, might disagree). Much of how you make the gelatin is dependent on the way it will be used. If it is going to be for a prosthetic appliance, one way could be preferable over another, but if you are making a prop body part, you could decide on a different formula to suit the project.
