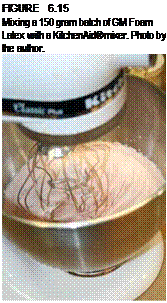
A typical batch of foam latex consists of 150 grams of high-grade latex base, 30 grams of foaming agent, 15 grams of curing agent, and 14 grams of gelling agent. There are other ingredients and quantities that can be added for different foam characteristics, but this is a good place to begin. As I mentioned, this operation is time and temperature sensitive as well as humidity sensitive; optimal conditions would be in a room at 69-72°F (20.5-22°C) and with 45-55% humidity. I am based in Colorado, so I have humidity (rather, the lack of humidity) to contend with as well as a lower high-elevation air pressure that also affects what I do. The above "optimal" conditions are based on mixing at sea level, so I’ll stick with that, since most of you will probably be working at lower elevations.
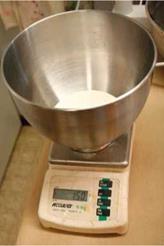
Weigh the first three components—the latex base, the foaming agent, and the curing agent—and add them to the mixing bowl. It would be good for you to have an accurate digital gram scale.


Weigh out the gelling agent into a small cup and set it aside. We won’t add that until we’re almost done mixing. If you’re adding pigment, put a few drops of your color into the bowl, too. Then place the mixing bowl into position and you are ready to begin. This will be a 12-minute mix. A timer that will count down is a plus, but if you can tell time and count, a clock or a watch will suffice. (Since you’re reading this book, I know you’re all very smart.)
1. ![]()

![]()
Your mold must be sealed and released—both the positive and the negative—to prevent the foam latex from sticking and tearing when you attempt to remove it after it cures. If you are using GM Foam, follow the simple instructions for GM’s release agent. If you are using different foam, do as you’re instructed for that product. Price-Driscoll’s Ultra 4 Epoxy Parfilm works pretty well (but only if the stone mold you’re using has been sealed and is no longer porous).
2. For the first minute, mix the ingredients on speed 1.
3. For the next 4 minutes, whip the ingredients on speed 10. This will froth the foam and increase the volume in the bowl. As I’ve already said, Gil Mosko, GM Foam’s founder, says to not be a slave to the schedule. Once you understand how foam latex works, you will be able to adapt to any situation.
What the high-speed mixing does in addition to creating high-volume foam is remove ammonia from the latex. Too much ammonia loss and your foam will gel too quickly; not enough ammonia loss and your foam might not gel at all. It might seem like you need a degree in chemistry to run foam (it certainly wouldn’t hurt) but that is why there is a mixing guideline to follow, so you don’t have to know specific pH values and other scientific-type stuff. Simply understanding the function of the ingredients and the stages of the process should be enough information to do some experimentation. Such as:
■ The foaming agent bonds as a soap that bonds to the cells of the latex, lowering the surface tension of the latex and allowing it to froth and rise more easily.
■ The curing agent contains sulfur to help vulcanize (strengthen and add elasticity to) the latex.
■ The gelling agent creates a reaction that changes the foam from a liquid into a solid.
Record notes of what you do when you are just beginning to work with foam latex as well as when you make changes to any part of the process. Things you might want to include in your notes are:
■ Air temperature
■ Humidity
■ Curing agent (amount, brand, date, and batch number)
■ Foaming agent (amount, brand, date, and batch number)
■ Gelling agent (amount, brand, date, and batch number)
■ Latex base (amount, brand, date, and batch number)
■ Additives: accelerators, stabilizers, etc.
■ Mixing times
■ Pigmentation (amount and color)
■ Gel time: start and finish
■ Baking time: in and out
■ Oven temperature
■ Mold: Ultracal, fiberglass, old, new, etc.
■ Results
