I don’t draw nearly as much as I ought to and as a consequence my skills aren’t nearly as good as I would like them to be. That’s partly to do with being an artist; I don’t ever particularly think my work is as good as it could be, but it’s also partly because I’m not very good at saying no and there’s always a lot on my plate. Anyway, the point I’m trying to make is that rather than work from sketches of a

![]()
|
![]()

 particular makeup design, as many artists do, I prefer to take what I see in my head and begin directly with sculpture. Whether you work from sketches, photos, 3D renderings from ZBrush,® or images printed from your mind’s eye, the process is essentially the same. There’s no right way or wrong way to sculpt a character makeup, but there are some steps and tips I will share that I have learned over the years, some from artists who have contributed a great deal to this book.
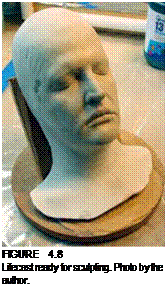
If you are going to be creating a multipiece, overlapping makeup, you need to coat your stone positive with two or three thin layers of Al-Cote® dental separator (and let it dry) before you begin to sculpt. Why? Because once you’ve decided how the sculpture will be broken up, you need to be able to get those pieces separated from the positive and from each other without destroying them. To do that your finished sculpt will need to be soaked in water to float off the clay pieces so they can be resculpted. Don’t fret; this task will be covered in the next chapter. This design is a one-piece face and neck, with a separate lip piece and separate ears.


