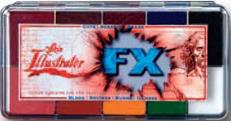
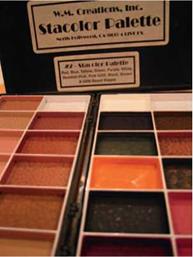
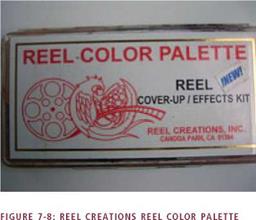
Painting or stippling in beard growth is done to show a “five o’clock” shadow or a few days growth without using any real hair glued onto the face. It is a basic, easy, fast technique that every Makeup Artists knows. It is sometimes requested last minute, on set, so always have your favorite stipple product and stipple sponges in your set bag. Skin Illustrator, Stacolor, and Reel Color Products make the Makeup Artist’s job a lot easier to achieve a lasting, water resistant, beard stipple. These products are all activated by alcohol, are water and abrasion resistant, easy to use, clean off quickly and do not rub off on clothing. They are great for doing so many different kinds of makeups that they are Industry Standards and invaluable for realistic effects and continuity. You should have all of their palettes in your makeup kit.
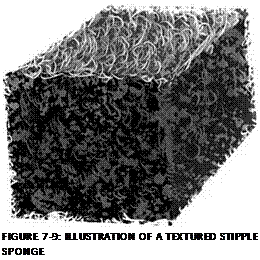
You will also be working with stipple sponges. Stipple sponges are textured sponges, available in different guages and density for different stippling effects. Orange stipple sponges are softer to the touch and more elastic. Black stipple sponges are coarse and much firmer than the orange ones. Stipple is also a term used for technique as well as to describe sponges and application.
It is part of the makeup industry’s vocabulary. An example of this terminology is if the Makeup Artist you are assisting says, “Stipple some color into his cheeks”—they
would be asking you to use the technique of stippling to add color to the cheeks with an up and down motion using a sponge or brush. It is not complete coverage; it is varied and inconsistent. The up and down motion is done with a light touch, using the wrist in a tapping motion. This gives a realistic look, that is not mask like. It is not complete coverage of color. There is an air quality to it and gives a variation of color and intensity that is organic. This technique is essential to a real-looking beard growth. You will use it often, and for many types of makeups. If you were to apply complete coverage for a beard growth it would look comical and clownish.
Stipple technique is also used to fill in real beards to make them look fuller or appear to have more growth, for long distance shots where you do not want to lay hair by hand, stunt doubles, and background artists who will not be shot in close up.
Let’s look at the three products and how to stipple a beard growth with them.
|
FIGURE 7-6: THE SKIN ILLUSTRATOR PALETTE |
coarseness and sometimes by hand with round natural bristle brushes in varying sizes.
Occasionally, I’ve used a dye brush and thumb technique splattering the stipple for an uneven look, then going in and removing obvious blobs. Illustrator is designed to be mixed according to the complexion you are working on. But, I’ll often start with a black, white, and yellow mix from the FX Palette and make variations. It’s really impossible to give a specific formula or even percentages since mixing is an individual painter’s eye and art. But I would always start with black as the base tone then mix in bits of yellow, blue and white to give that blue or green cast that beard stubble can have. Adding in additional colors is for fine-tuning to suit an individual. Varying opacity and building layers rather than trying to do it in one shot (always a mistake-unless you want it to look fake) is the best approach.
|
FIGURE 7-7: STACOLOR PALETTE |
![]()
 Matthew Mungle: Apply GBB Beard Stipple using different densities of beard stipple sponges (black beard stipple sponges) or thinned down liquid StaColors with 99% alcohol and air brush on using a splatter technique. Airbrush can be purchased through bearair. com, Combo kit with compressor and Paache H brush with #3 nozzle.
|
|
If you have any heavy deposits, use a Q-tip dipped in reel developer (99% Isopropyl alcohol), and touch the glitch once for a couple of seconds, then turn over the Q-tip and touch again; this should lift the color. Do not rub! It will smear and ruin the look.
If you have any dark areas, you may use the same type of sponge and counteract the beard stipple with a flesh – tone mix (Cover-up Effects Palette). Stipple lightly on the heavy areas and the beard will lay down to match the desired shade. This is also a good technique for a salt and pepper look.
If you chose to use Reel Body Art instead of the palette, it is a good idea to pour the colors into a wide lid (i. e., pancake lid one for each color). Let it thicken or dry. Then use the same technique as with the palette. Do not be afraid to lighten (density) color using some Reel Developer.
![]()
Fred Blau, founder of Reel Creations:
Using the cover-up effects palette and depending on the color, I usually use browns mixed with black. I use a coarse plastic wire type stipple sponge, and cut the hard edges off to make a semi round surface. The sponge should be about two inches. When stippling, don’t try to cover large areas at once.
Dip sponge into the color then test on another surface. When density is good, you might get two to three hits on the face. Yes, it is time-consuming but it works and it lasts.
 Stipple sponges are stiff sponges made in different textures used in makeup to create a variety of shapes and textures.
|
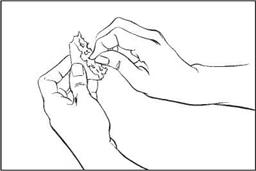
FIGURE 7-10: A COSMETIC SPONGE MADE INTO A STIPPLE SPONGE |
Stipple sponges can also be made from regular cosmetic sponges by tearing a desired number of holes into the sponge. This will create texture.
Favorite adhesives to use for chopped hair applications: Extra Hold Matte Adhesive.

